.png?table=block&id=2bc6d7f5-2b1a-41e6-9163-c2179a59e34e&cache=v2)
Do not index
Whenever your site’s DNS records are hosted on AWS Route 53, this is the way to go. Any type of website can be configured using this method, the site can be in NextJS, webflow, framer,..etc, and this single method will work for all.
Our aim is to add Cloudfront in front of the site hosting setup.
Let’s say your main domain is
www.imhereonlyfortesting.com and feather blog url is imhereonlyfortesting.feather.blog and you are choosing to host on /blog sub-folder. To configure following, let’s get started,1. Go to Cloudfront and click on create distribution
2. Add following configurations under “Origin”
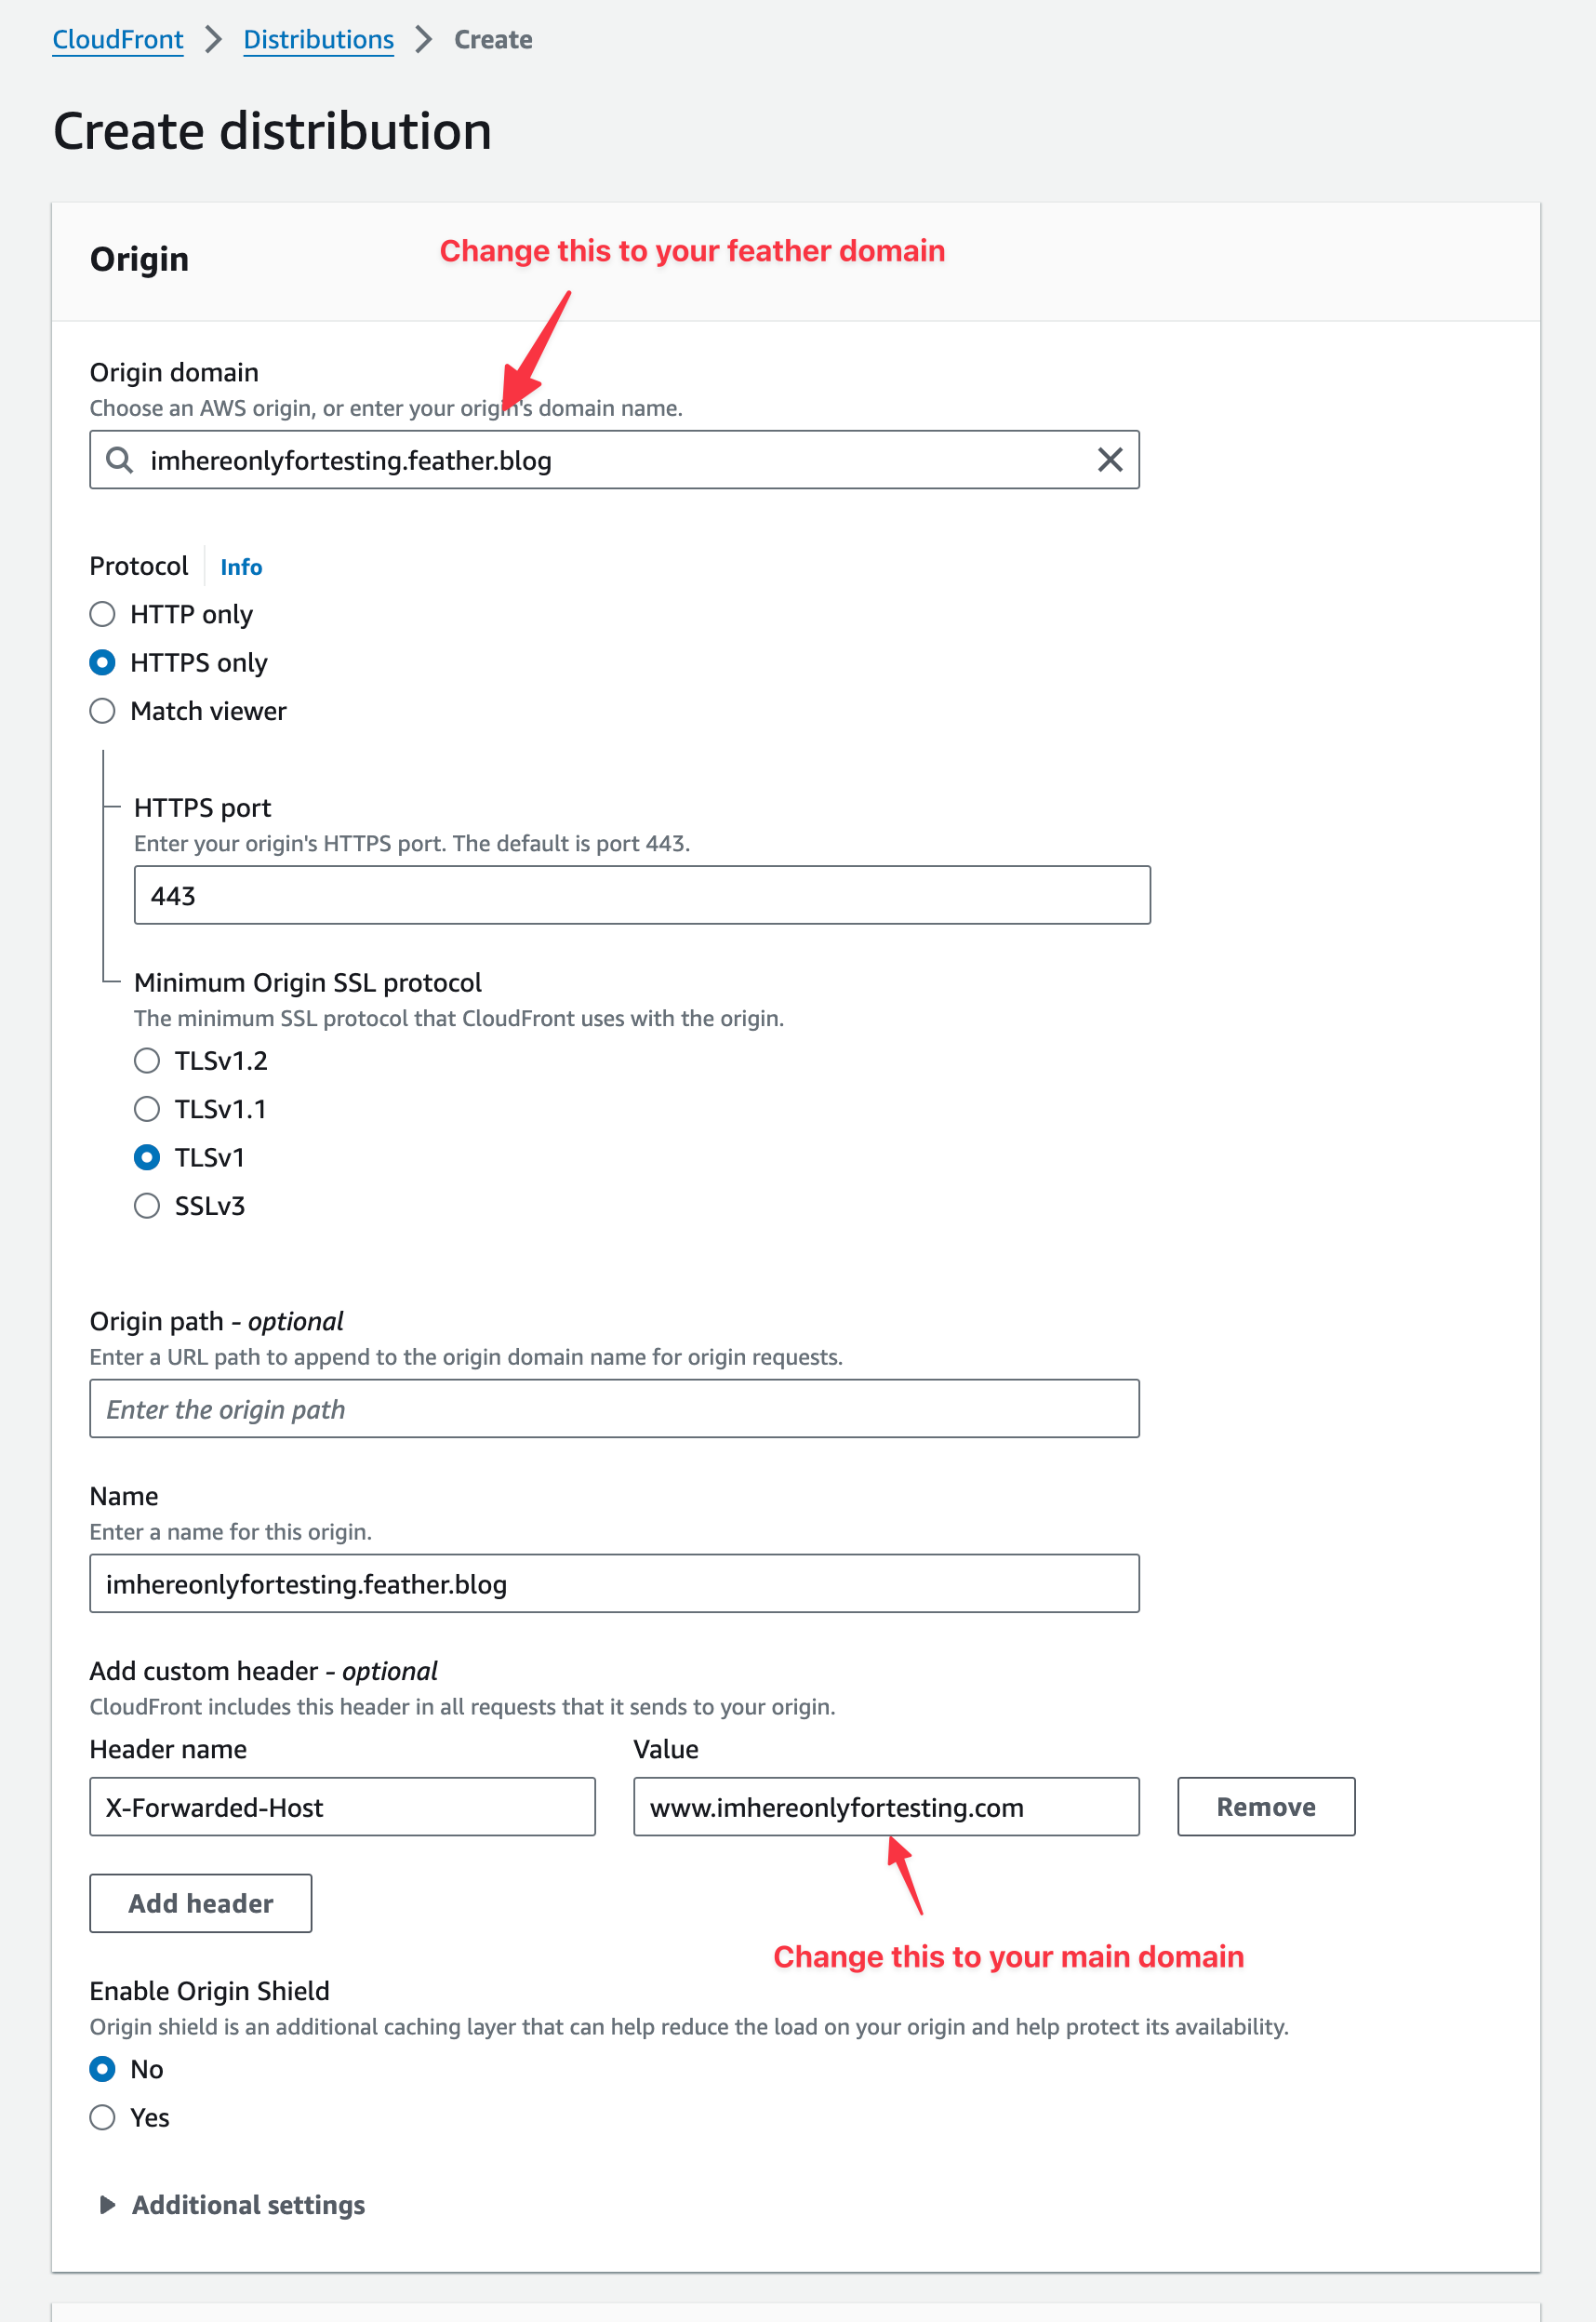
Make sure to add your feather domain in “Origin domain” field and your main domain in Header’s value field.
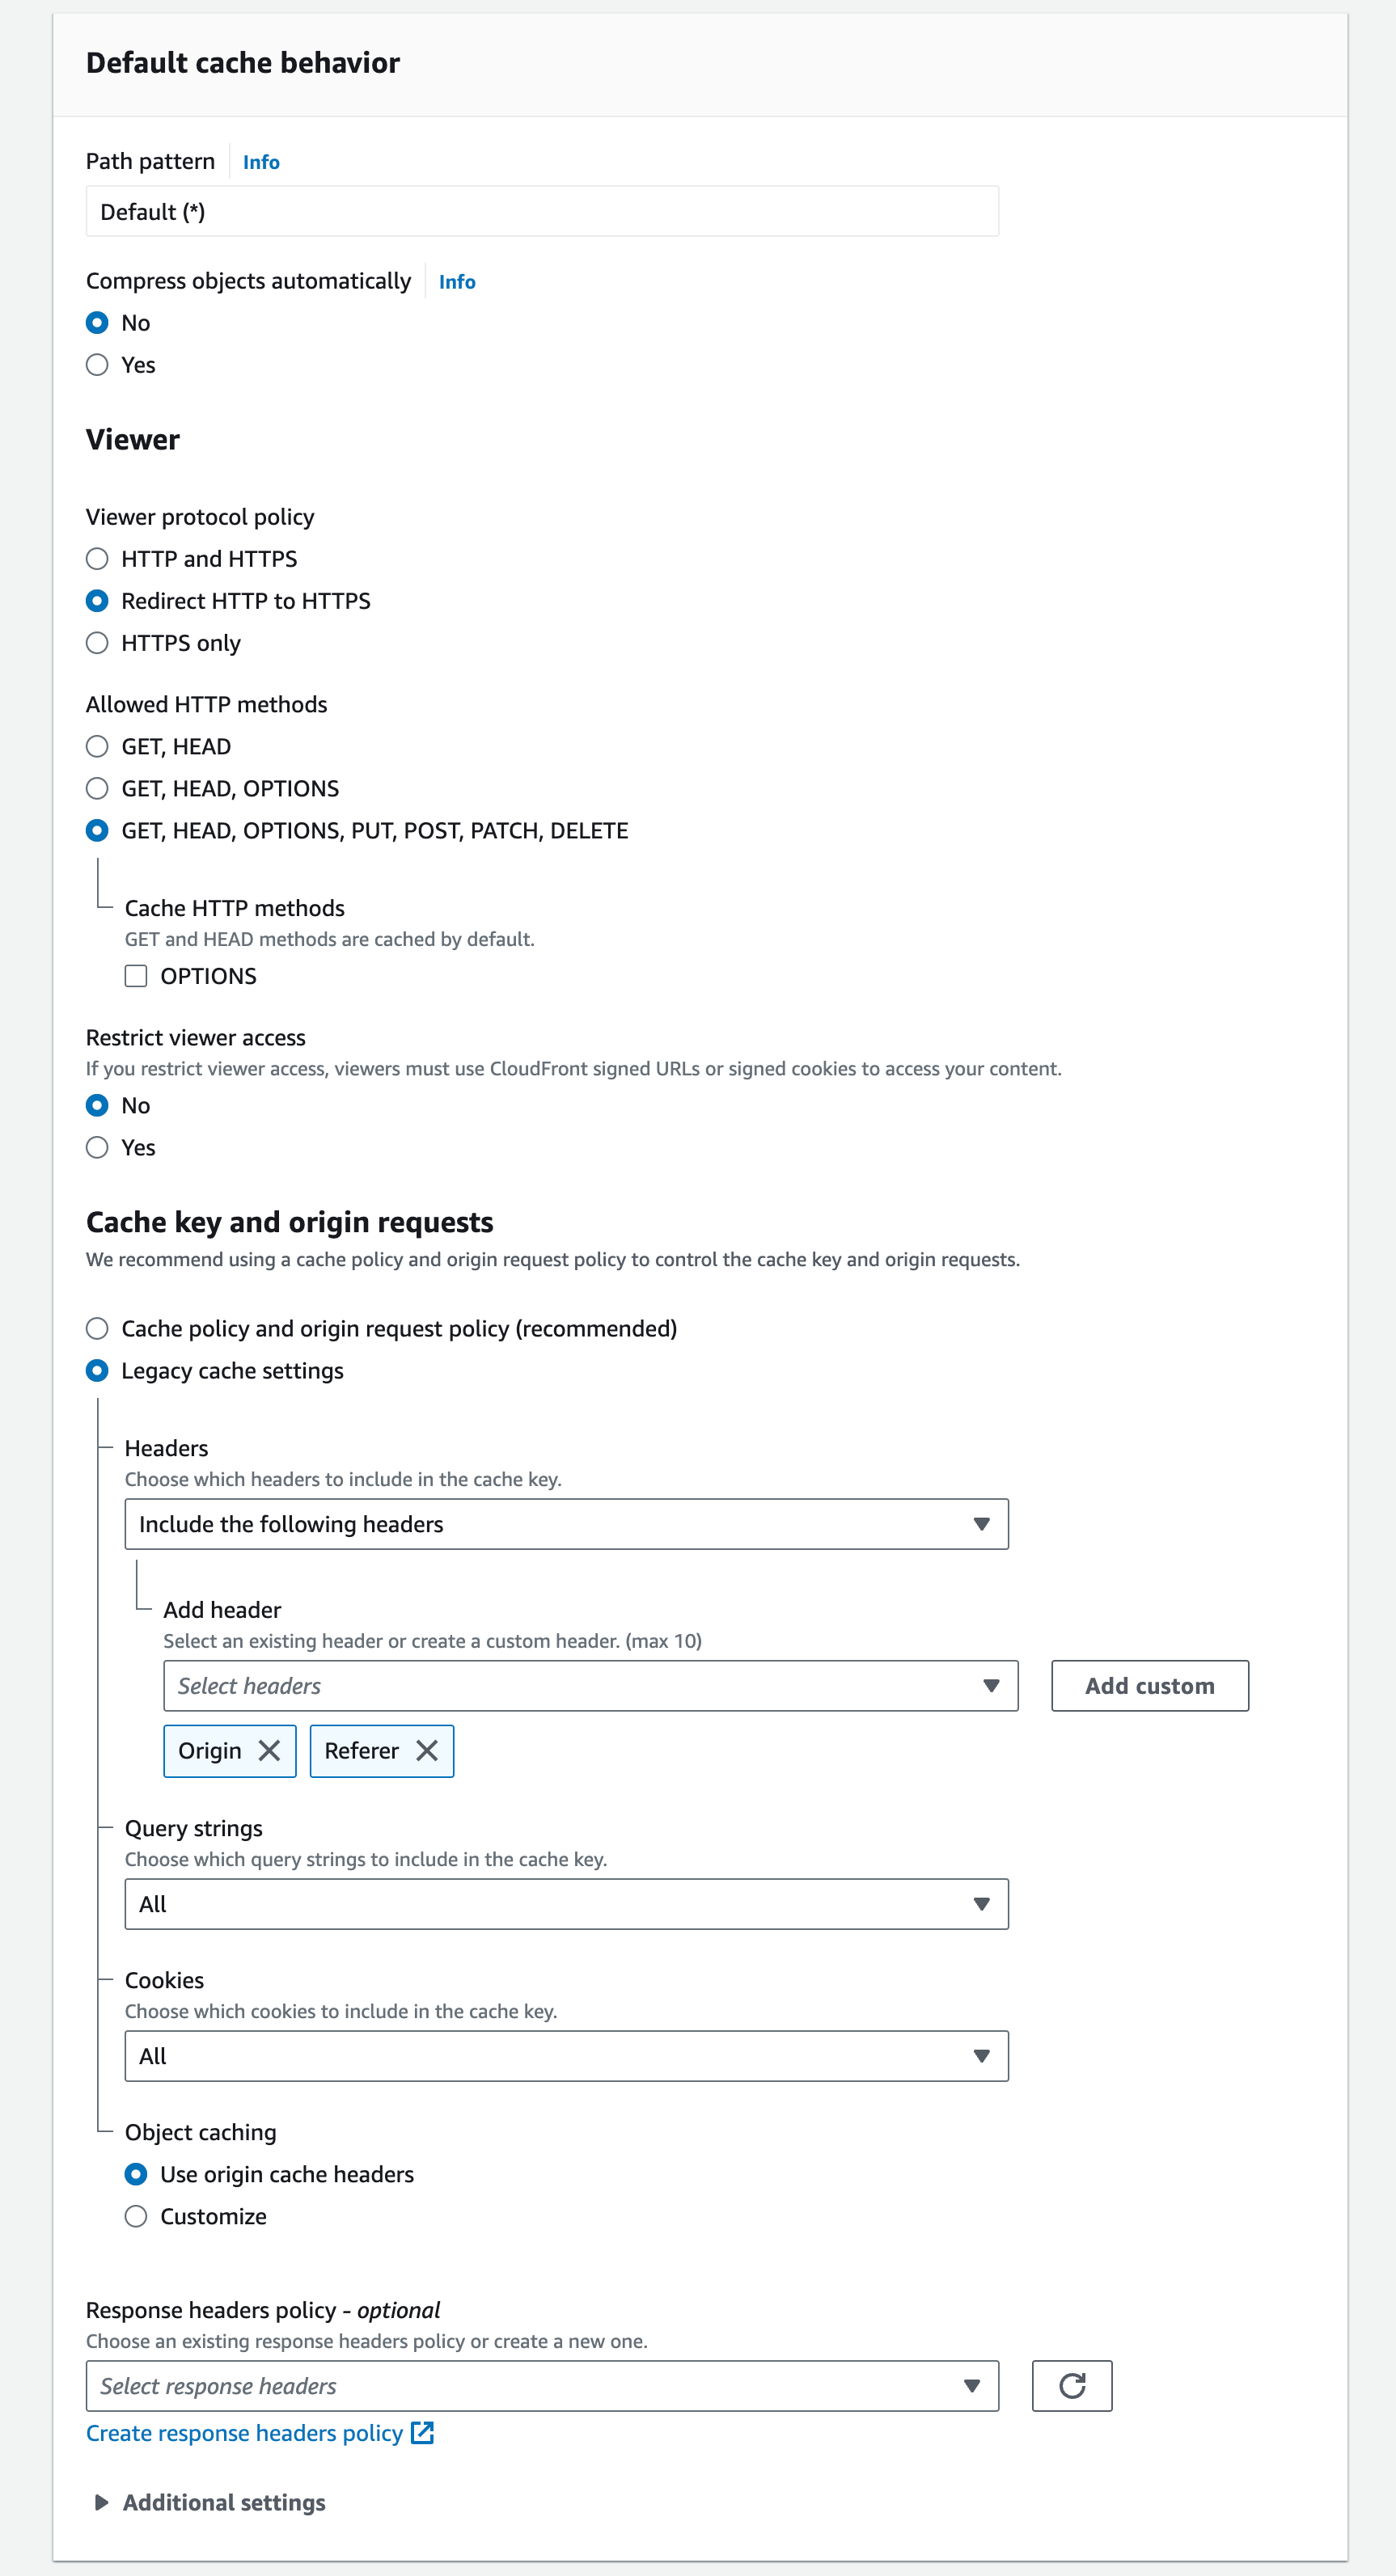
3. Add following configurations for Default cache behavior
4. Function associations & Web Application Firewall setting will look like this

5. Add the following settings.
If you do not have a Custom SSL Certificate, you can easily get it by pressing “Request Certificate”. I’ll will show you how to do that after this setup.
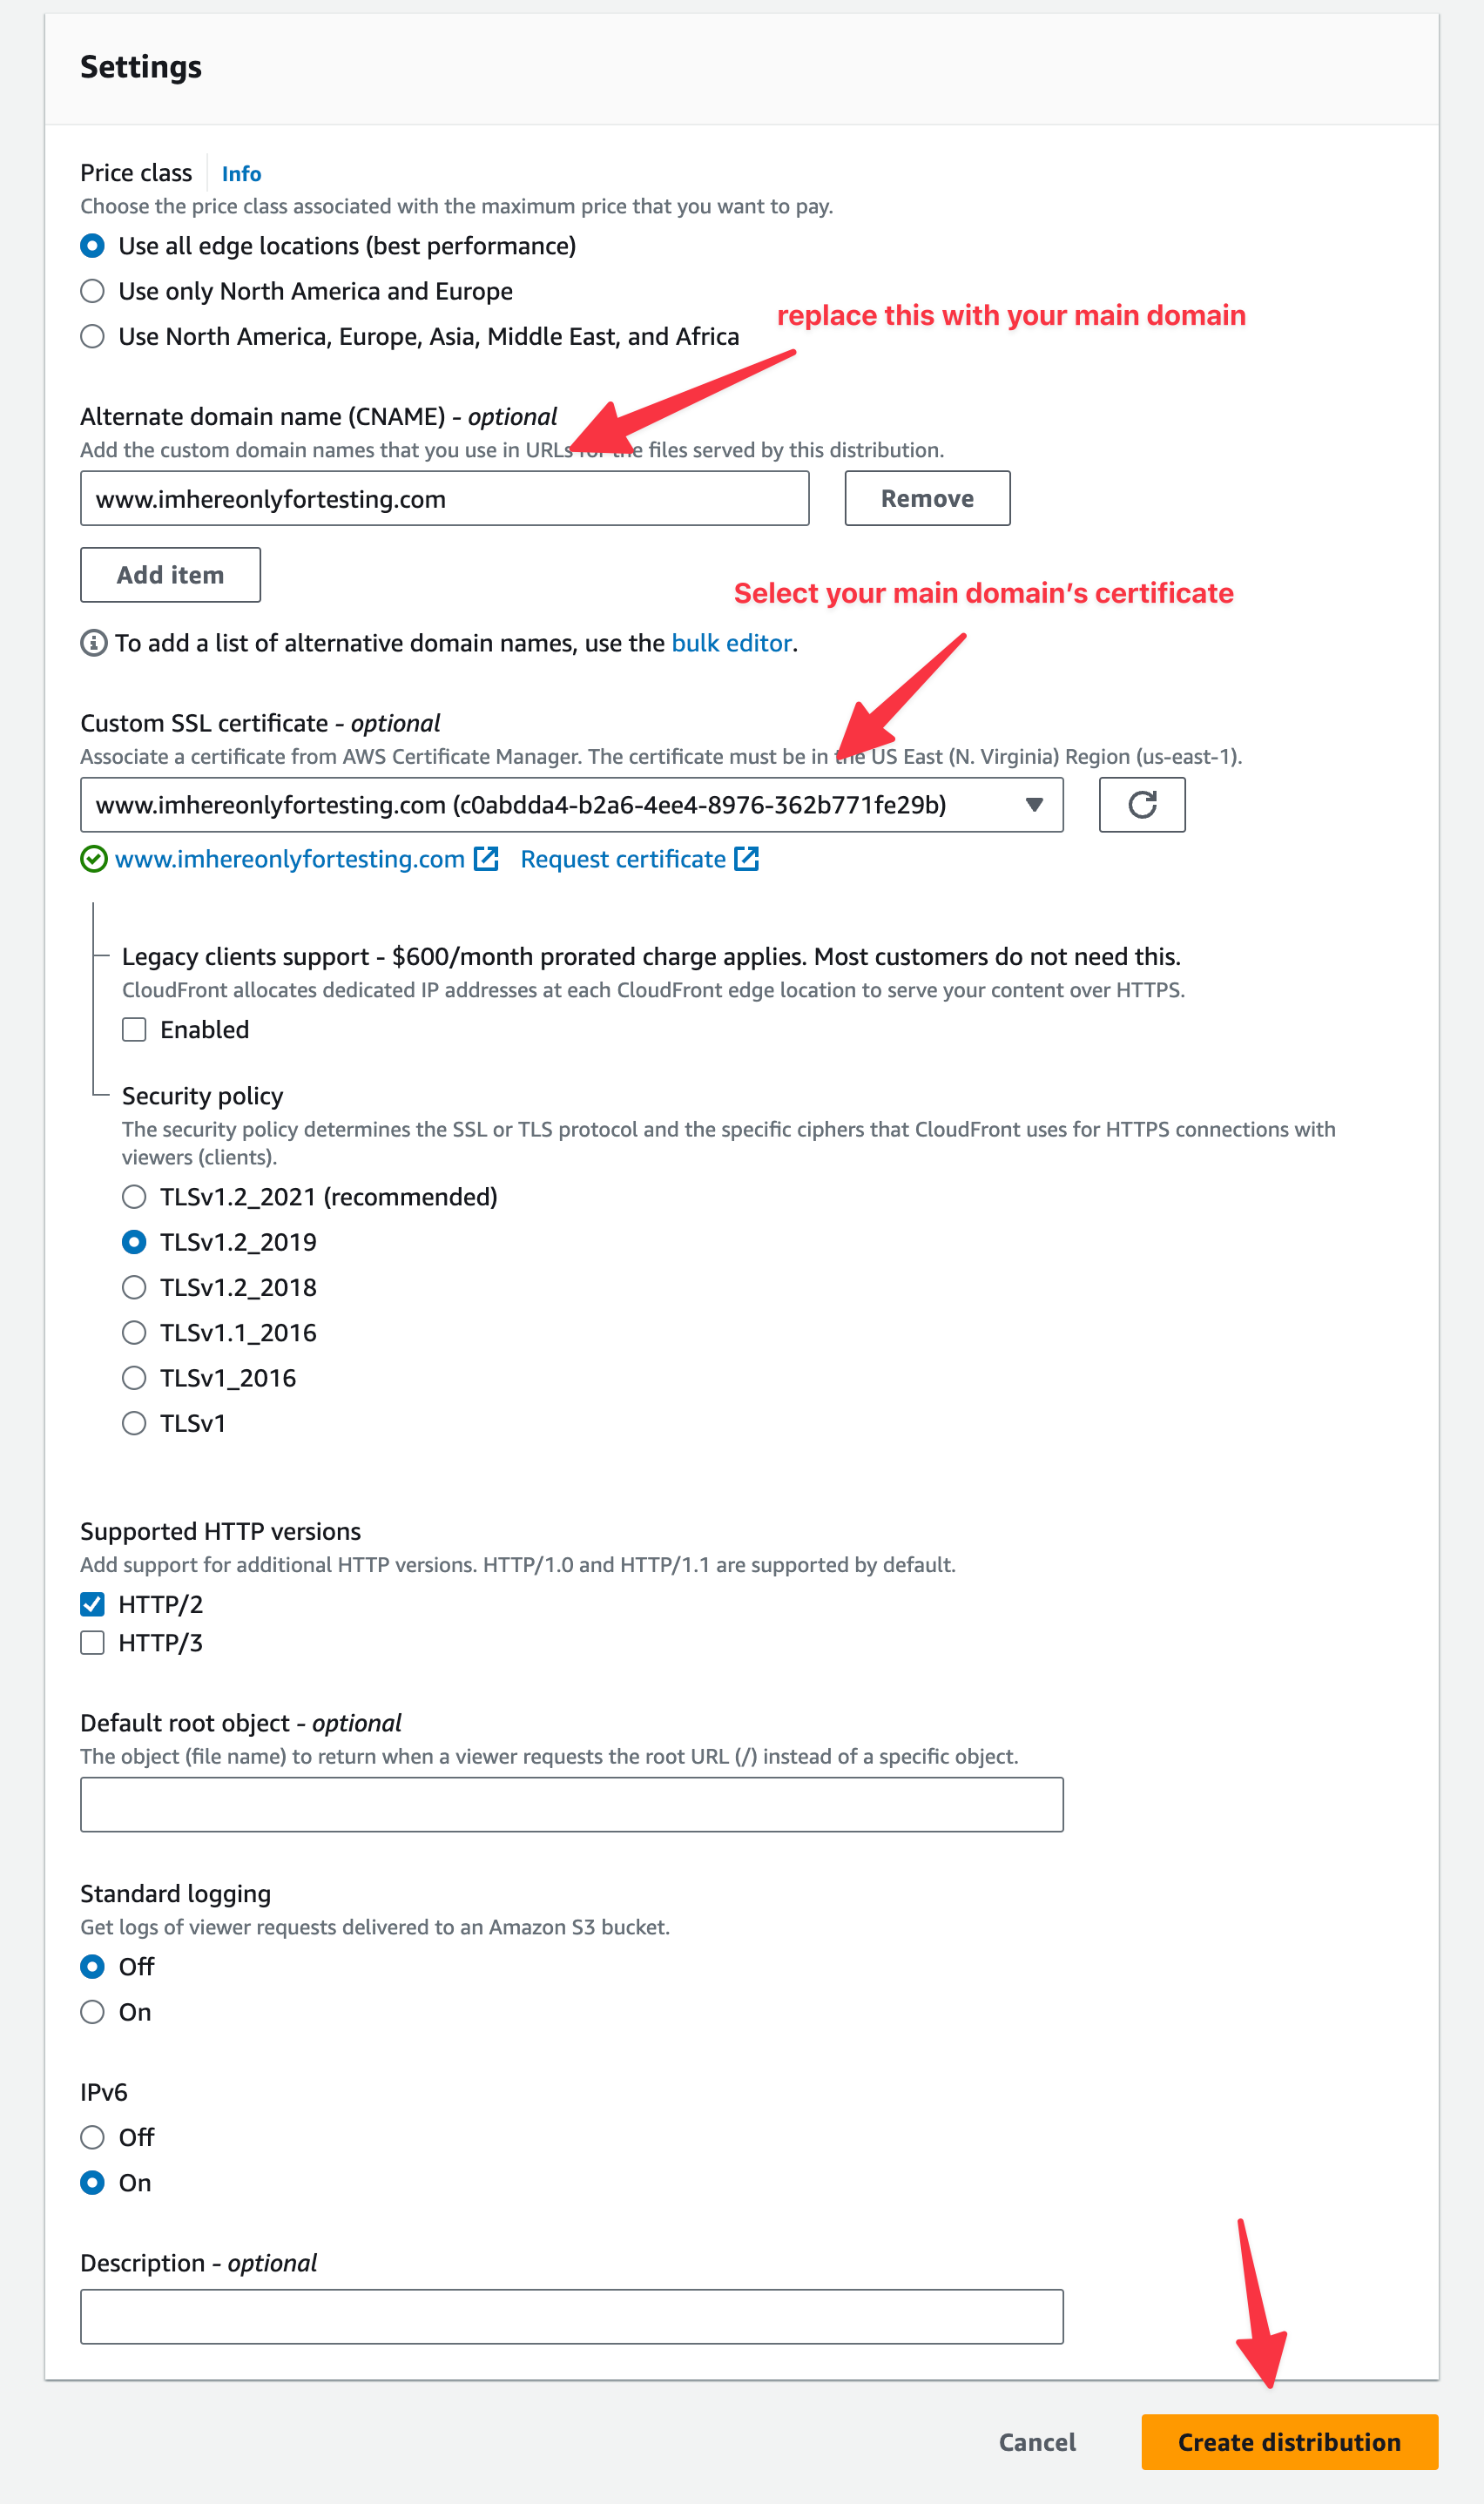
Custom SSL is required! Do not proceed without it. If you do not have onc, you can easily create by following below steps.
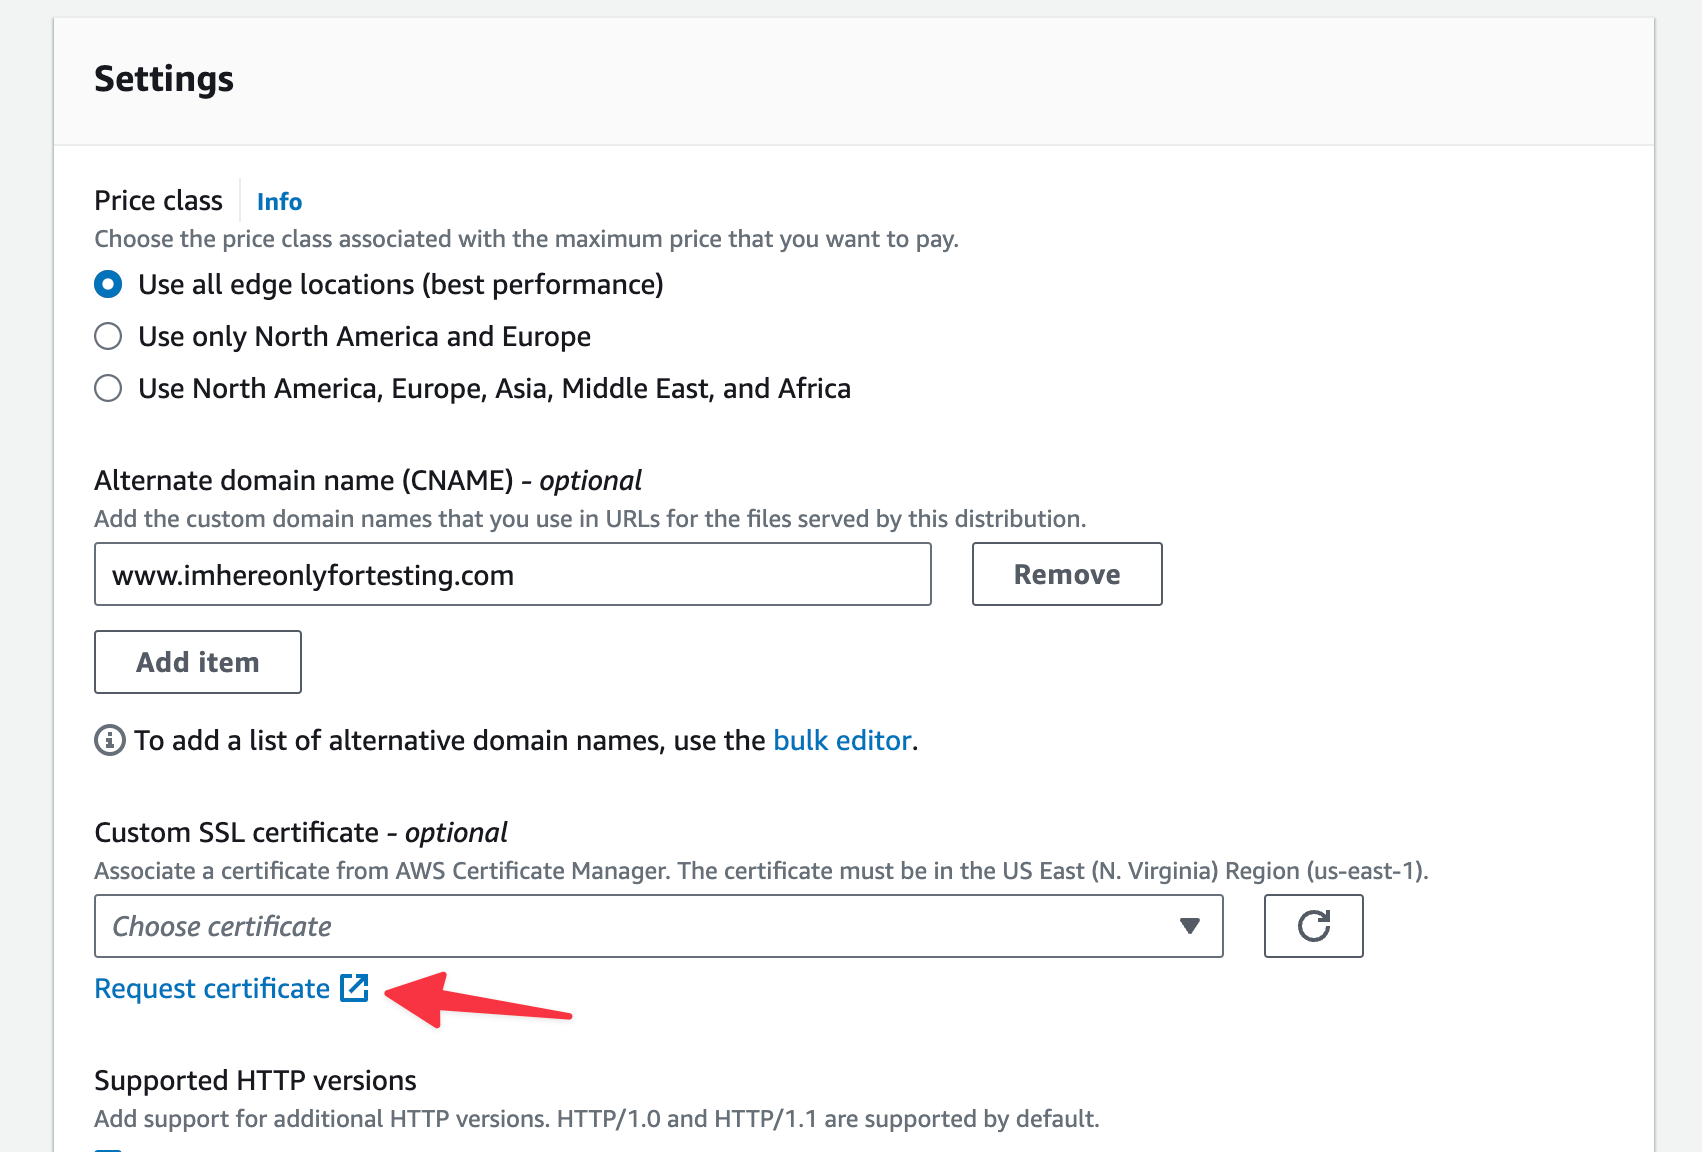
Optional step: if you don’t have custom SSL certificate
I. Click on “Request Certificate”
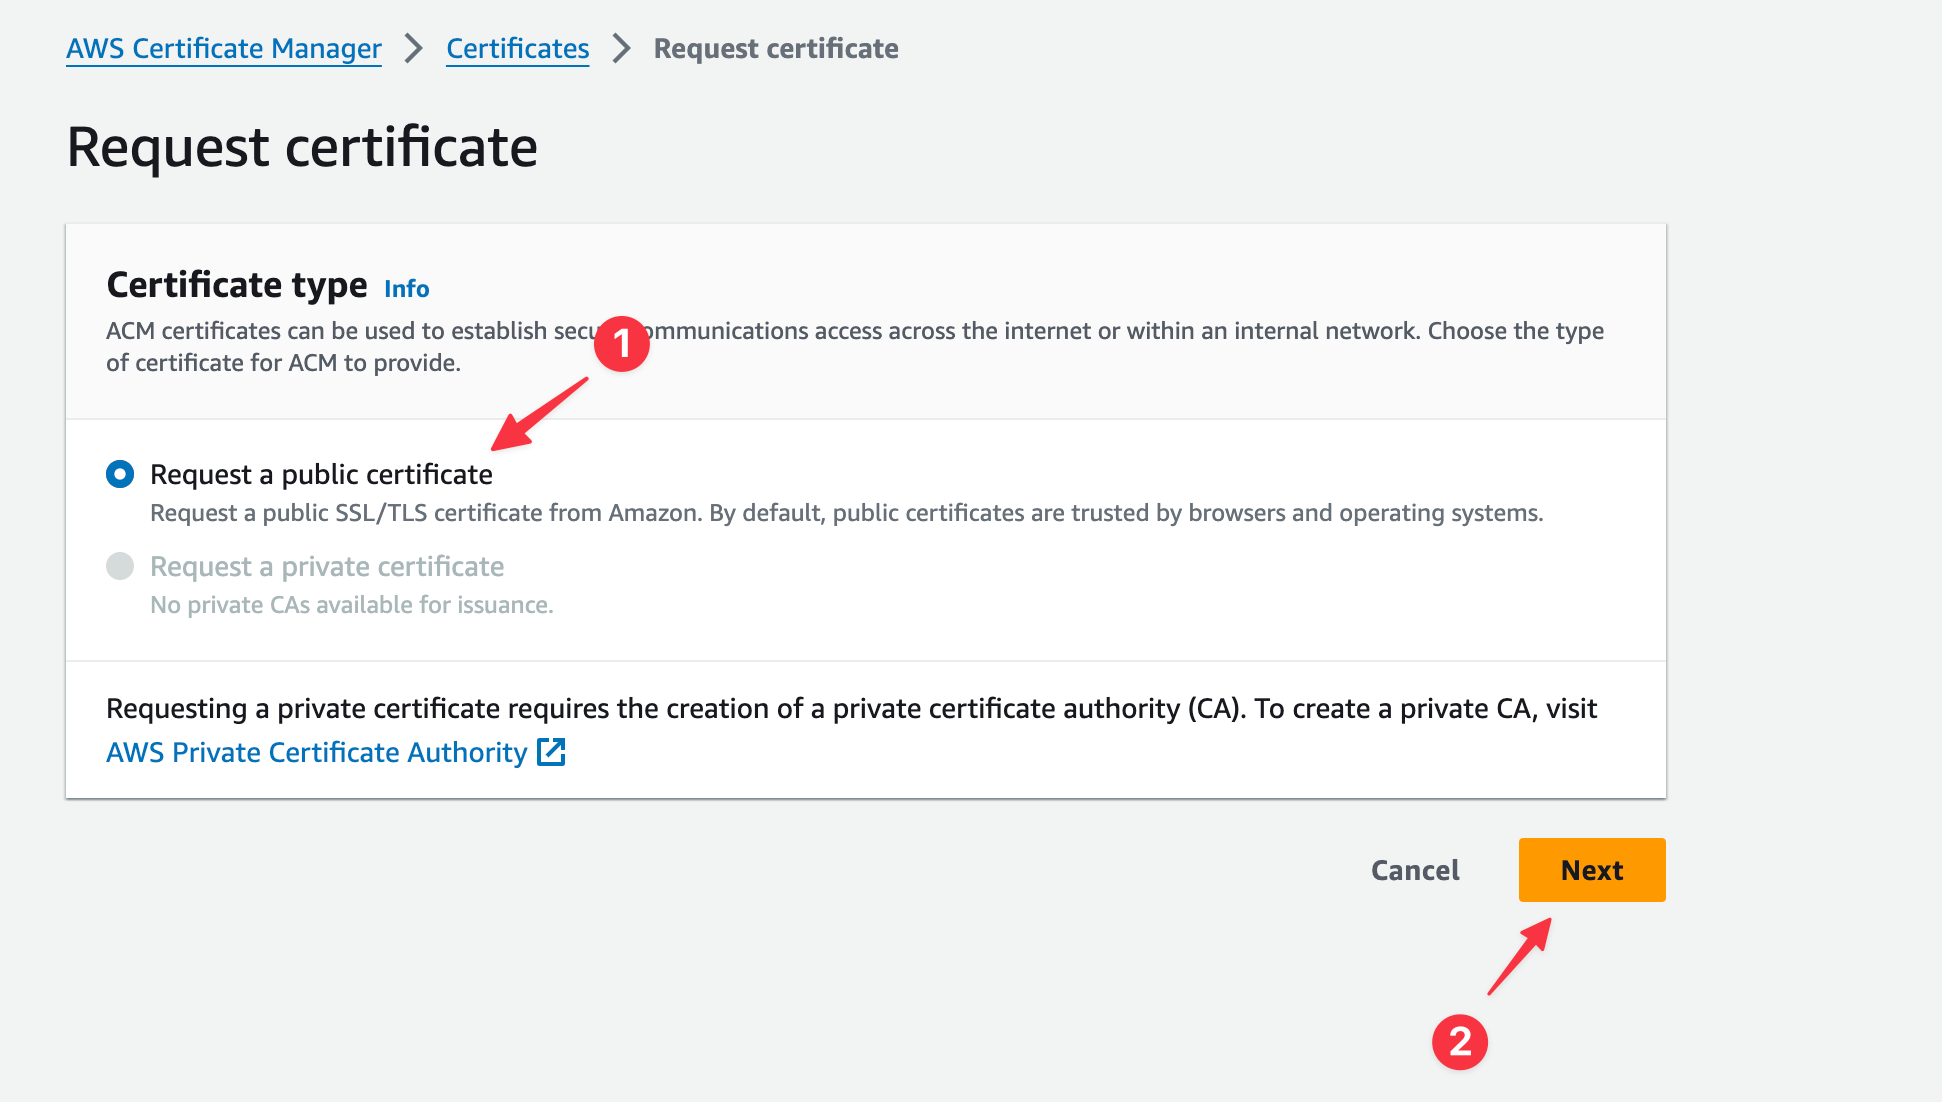
II. It will take you to AWS certificate manager. Select “Request a public certificate” option and press Next.
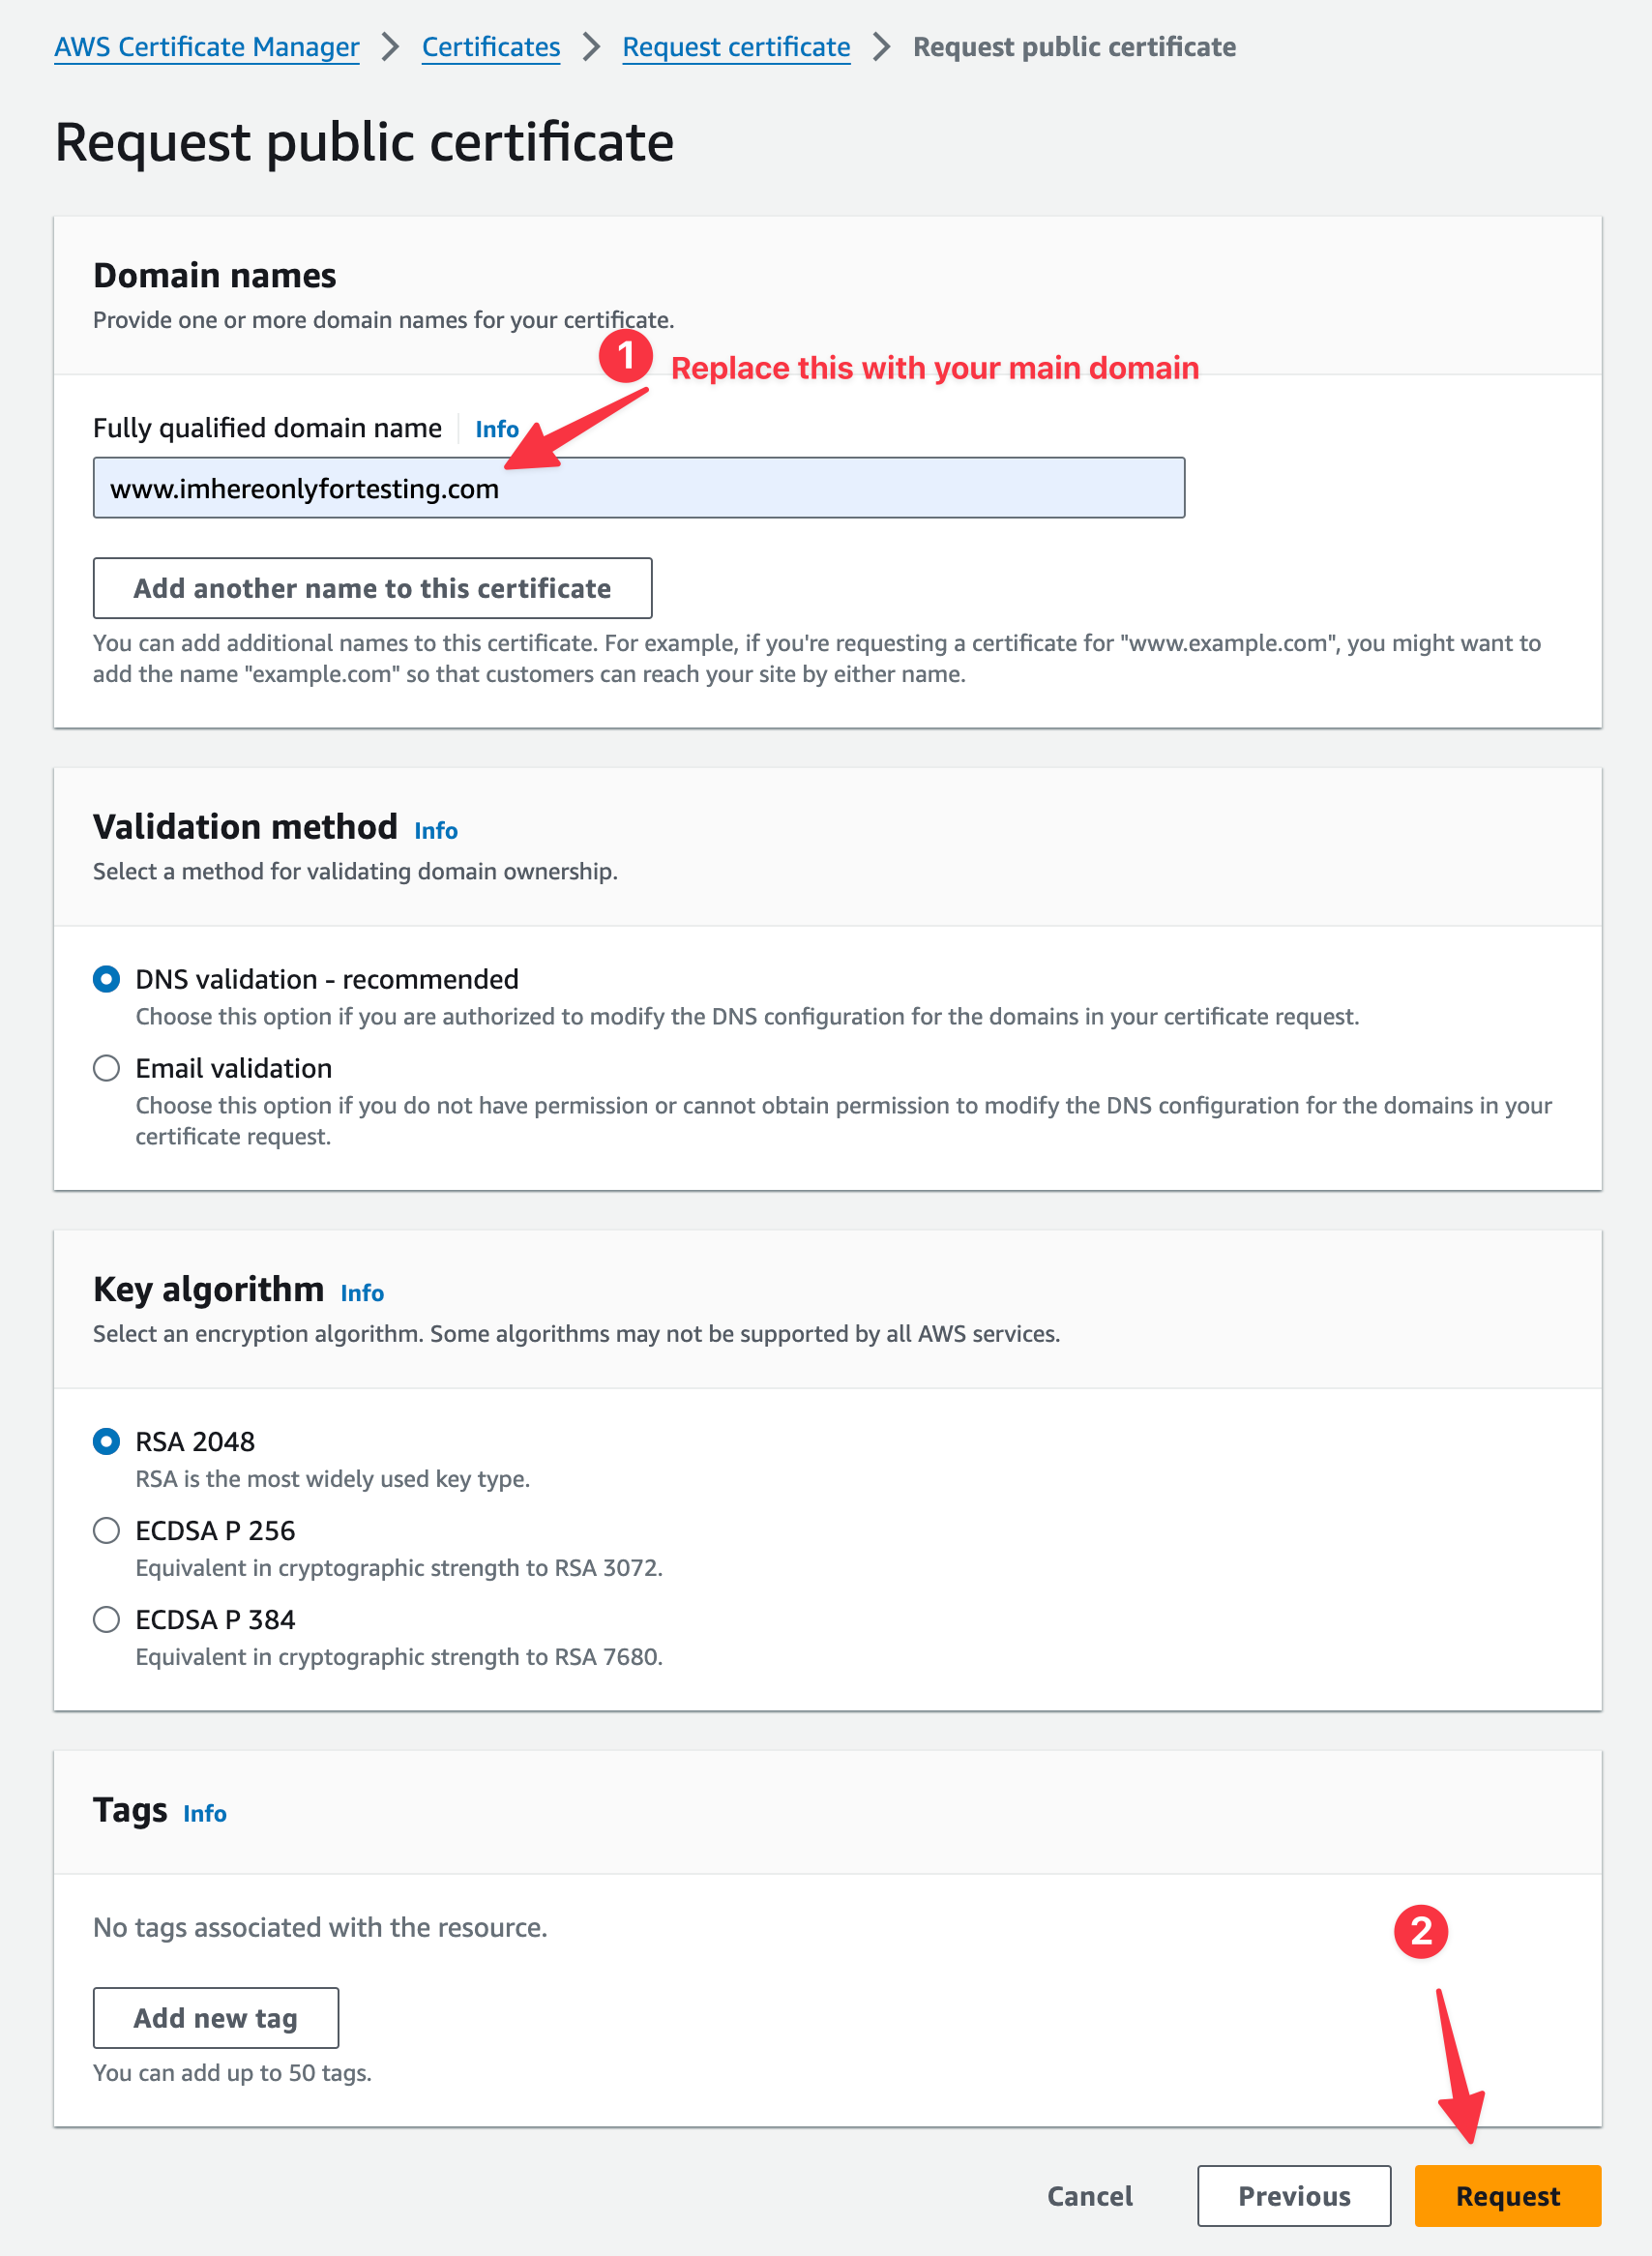
III. Add your main domain in “Full qualified domain name” field and press Request.
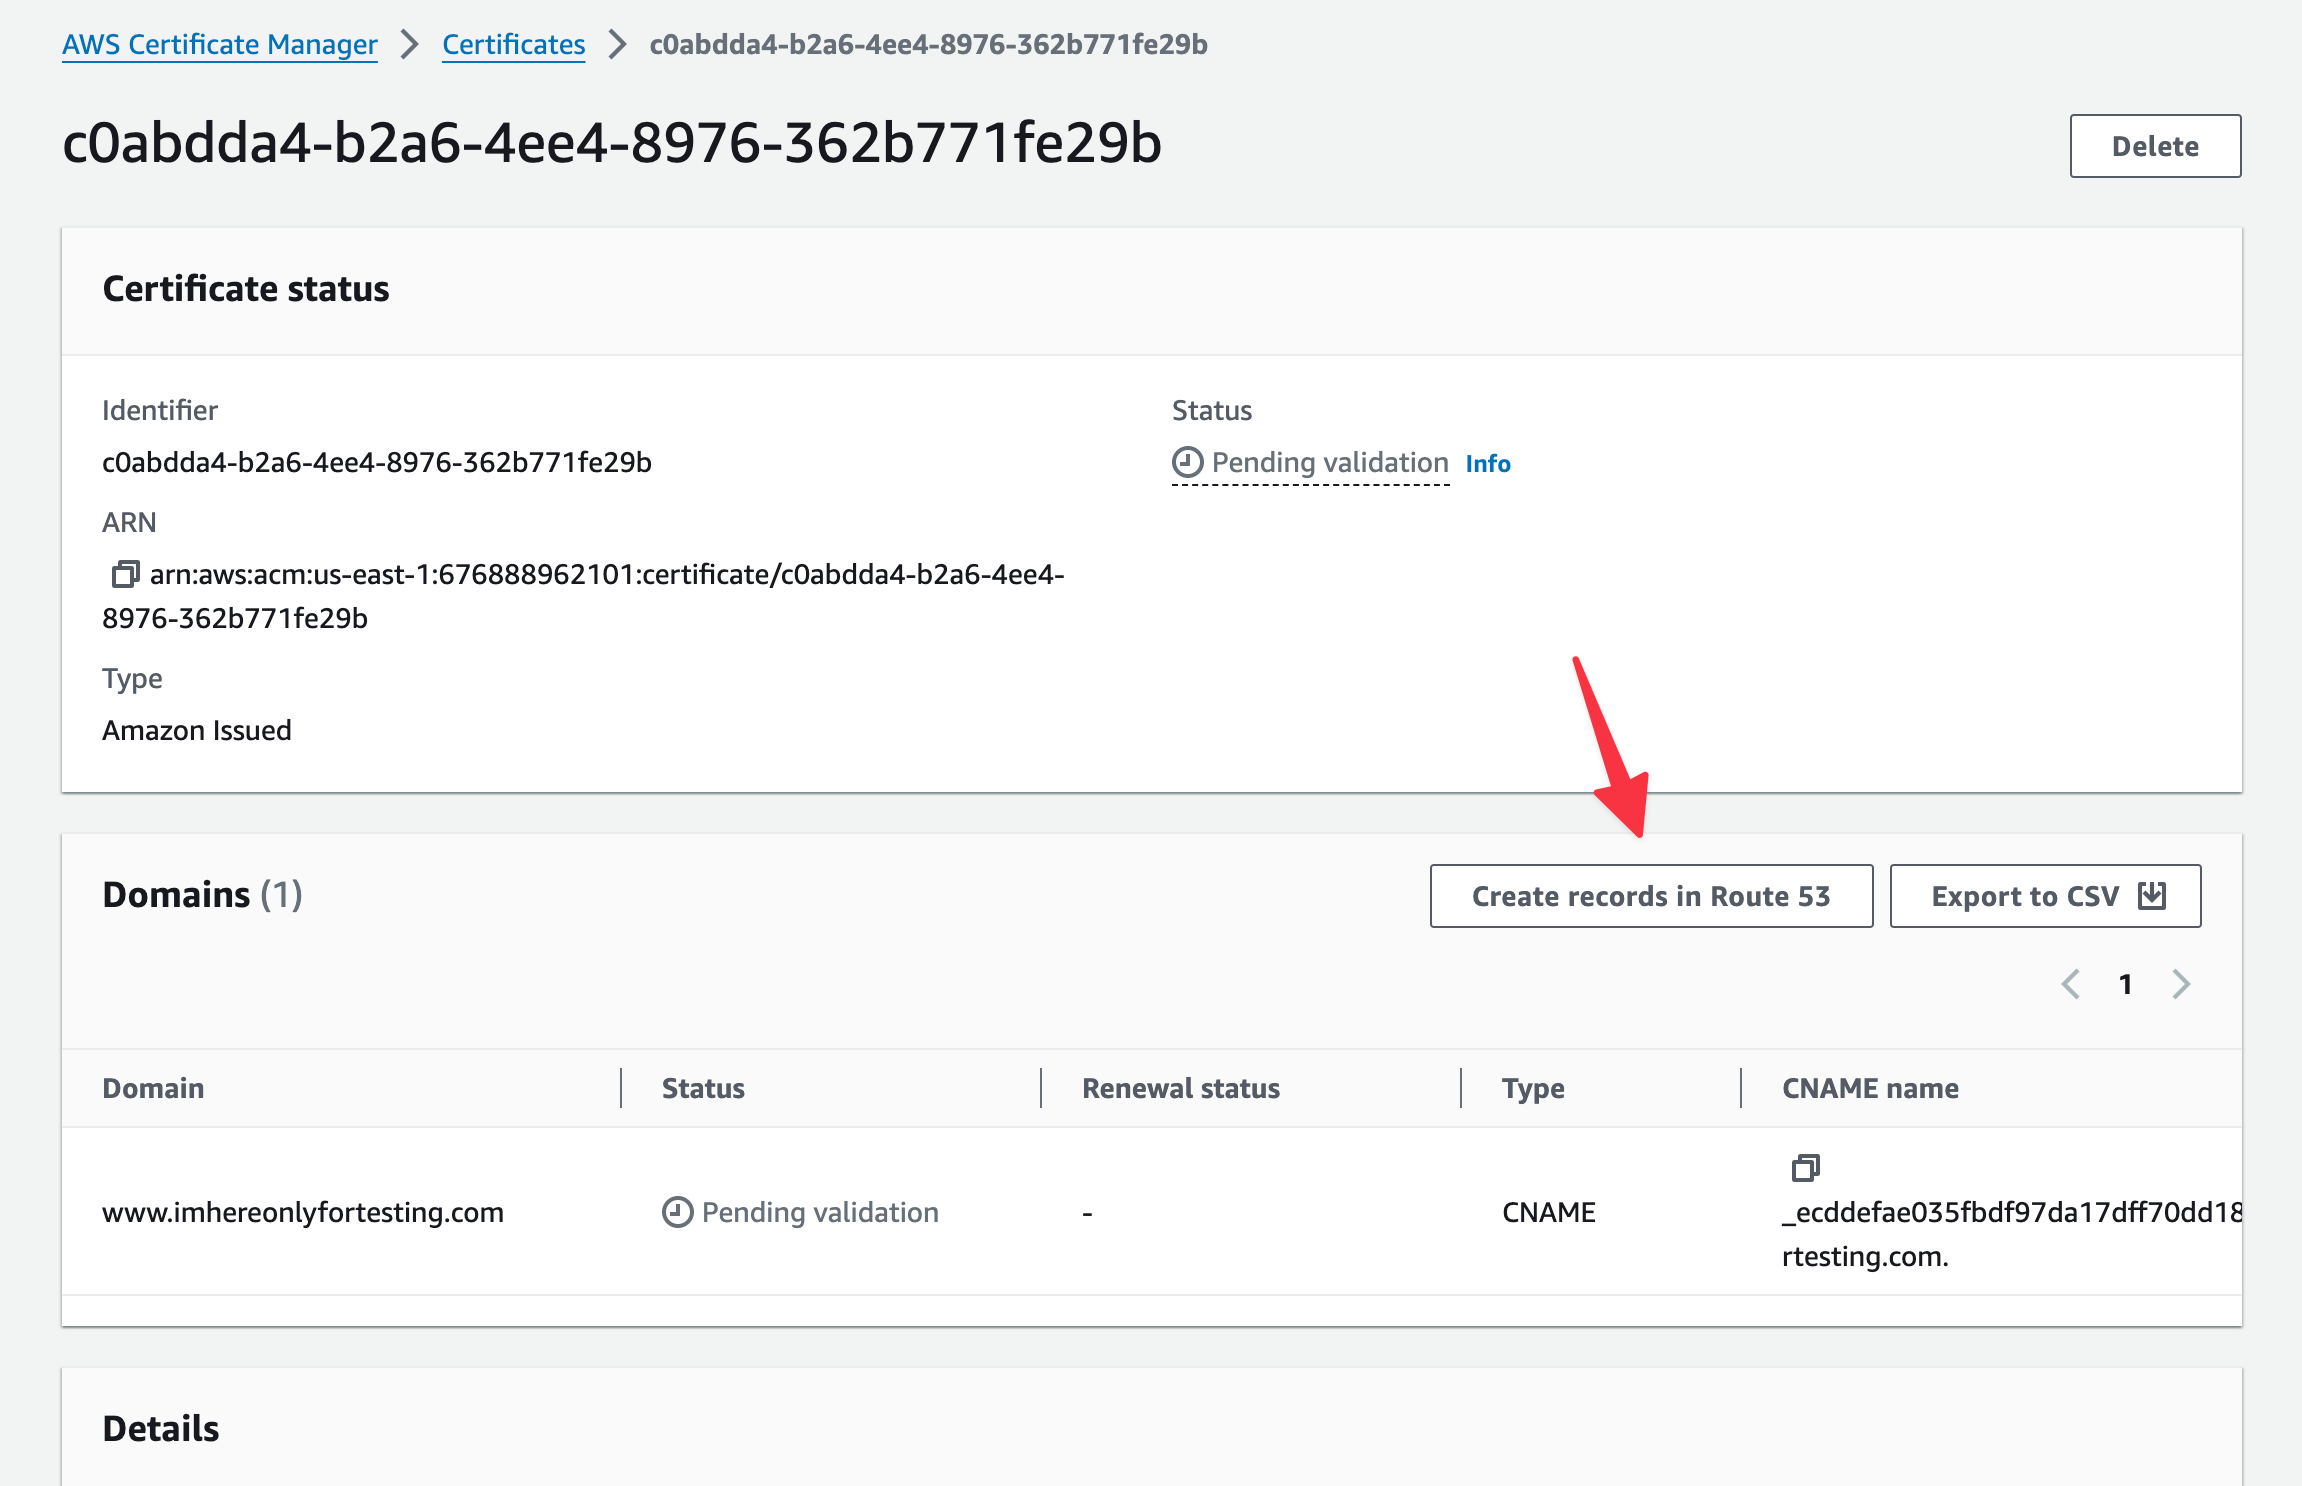
IV. Certificate will get generated but you will notice it shows pending validation. To make it a success, we will have to add the generate validation record to our DNS. To do that press on “Create records in Route 53” button
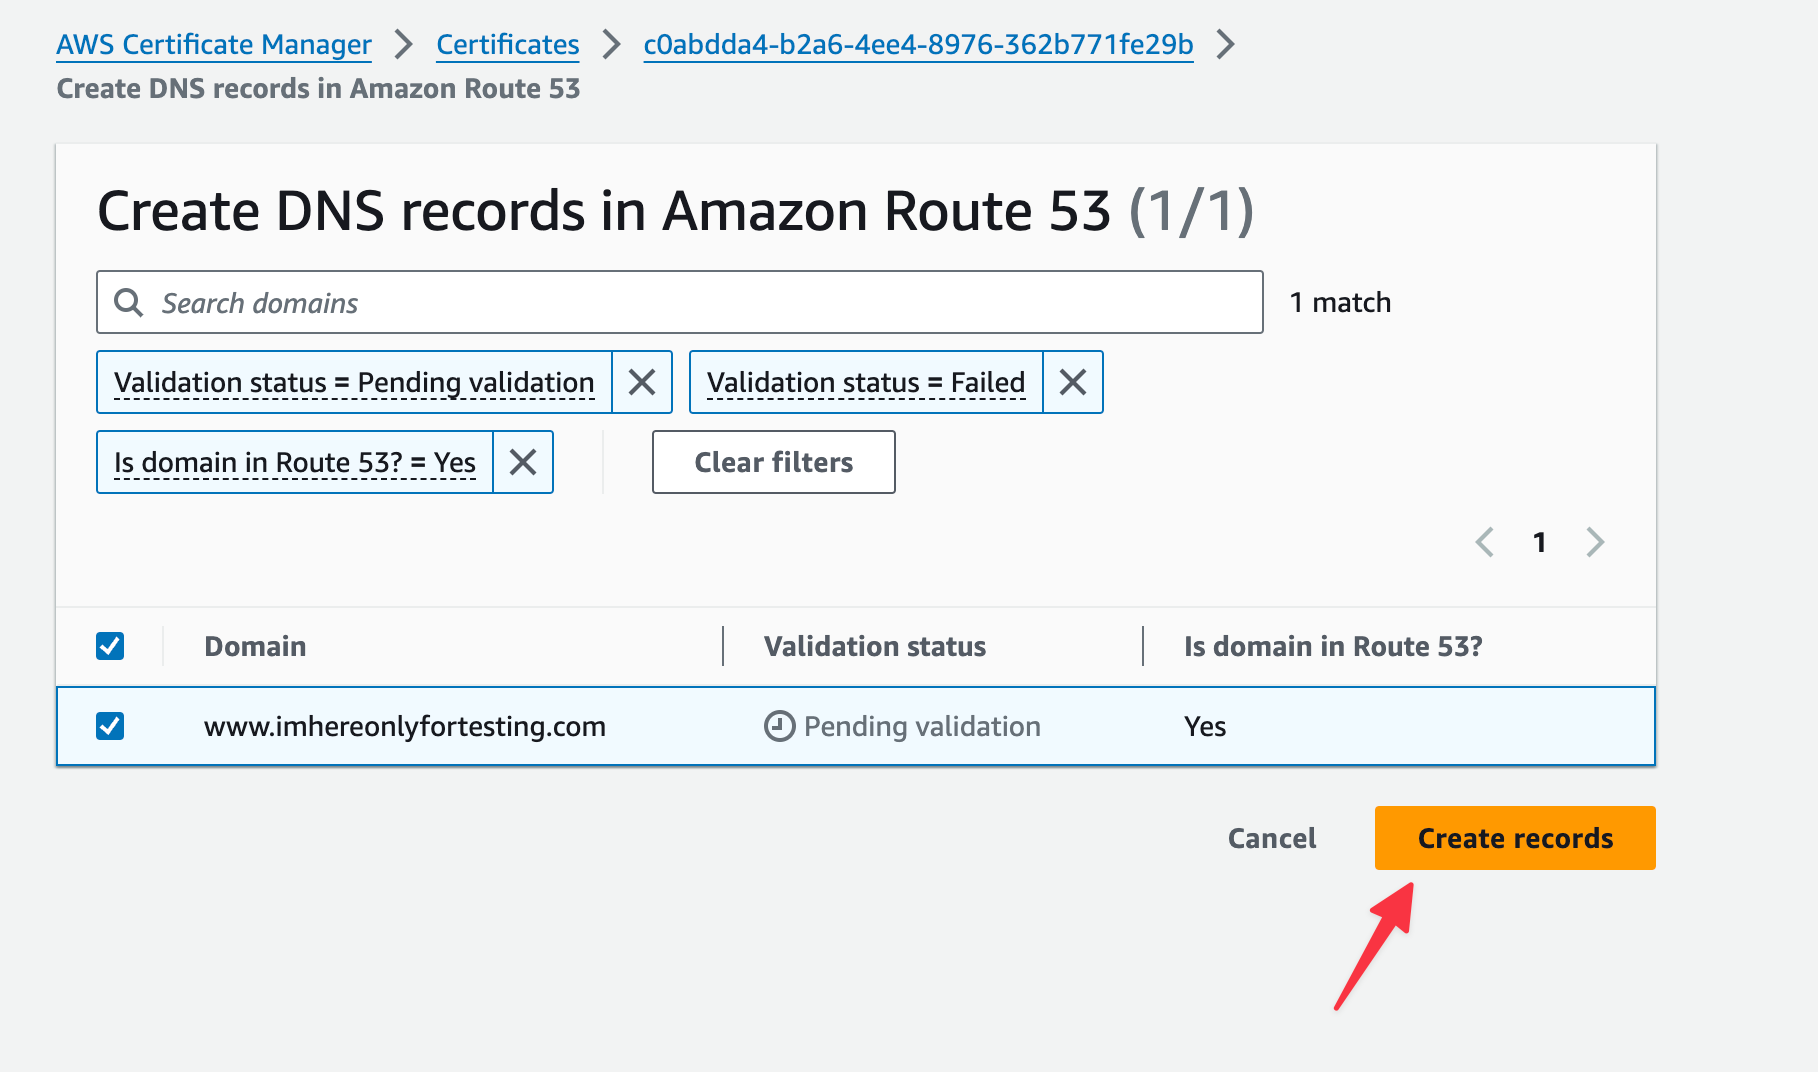
V. It will take you here and now click “Create records”
VI. After you submit, you will be redirected to our certificate. After few minutes, refresh the page. It should show “Status as issued” and “Status as Success”.
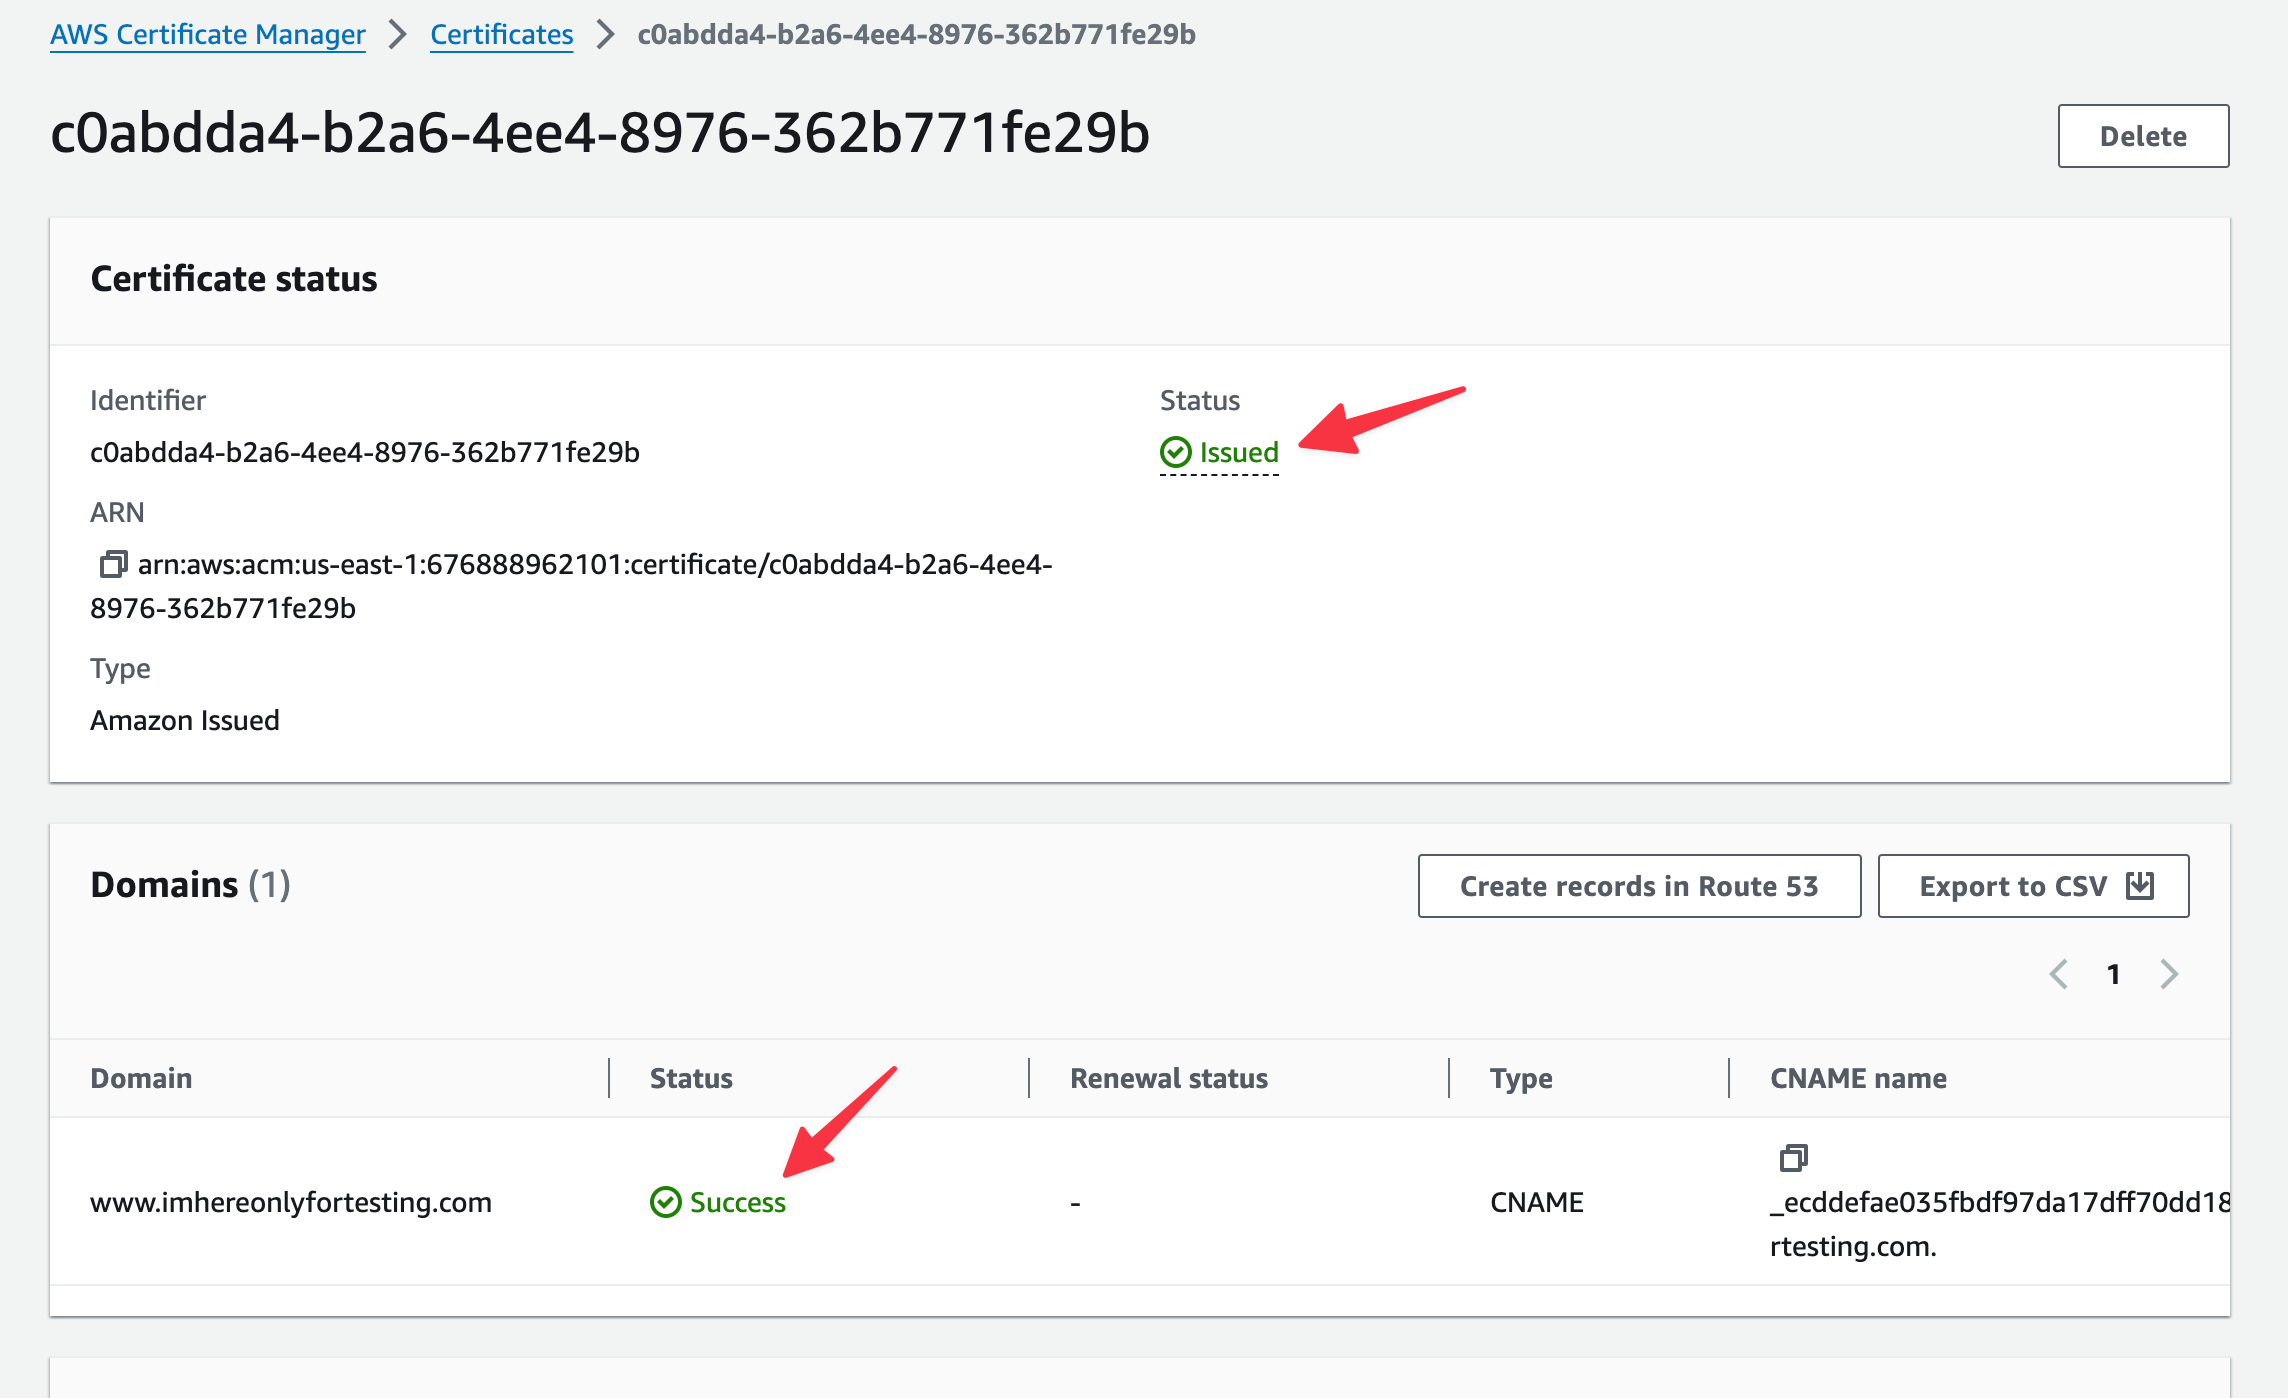
You have successfully generated the certificate. You can now go back to step 5.
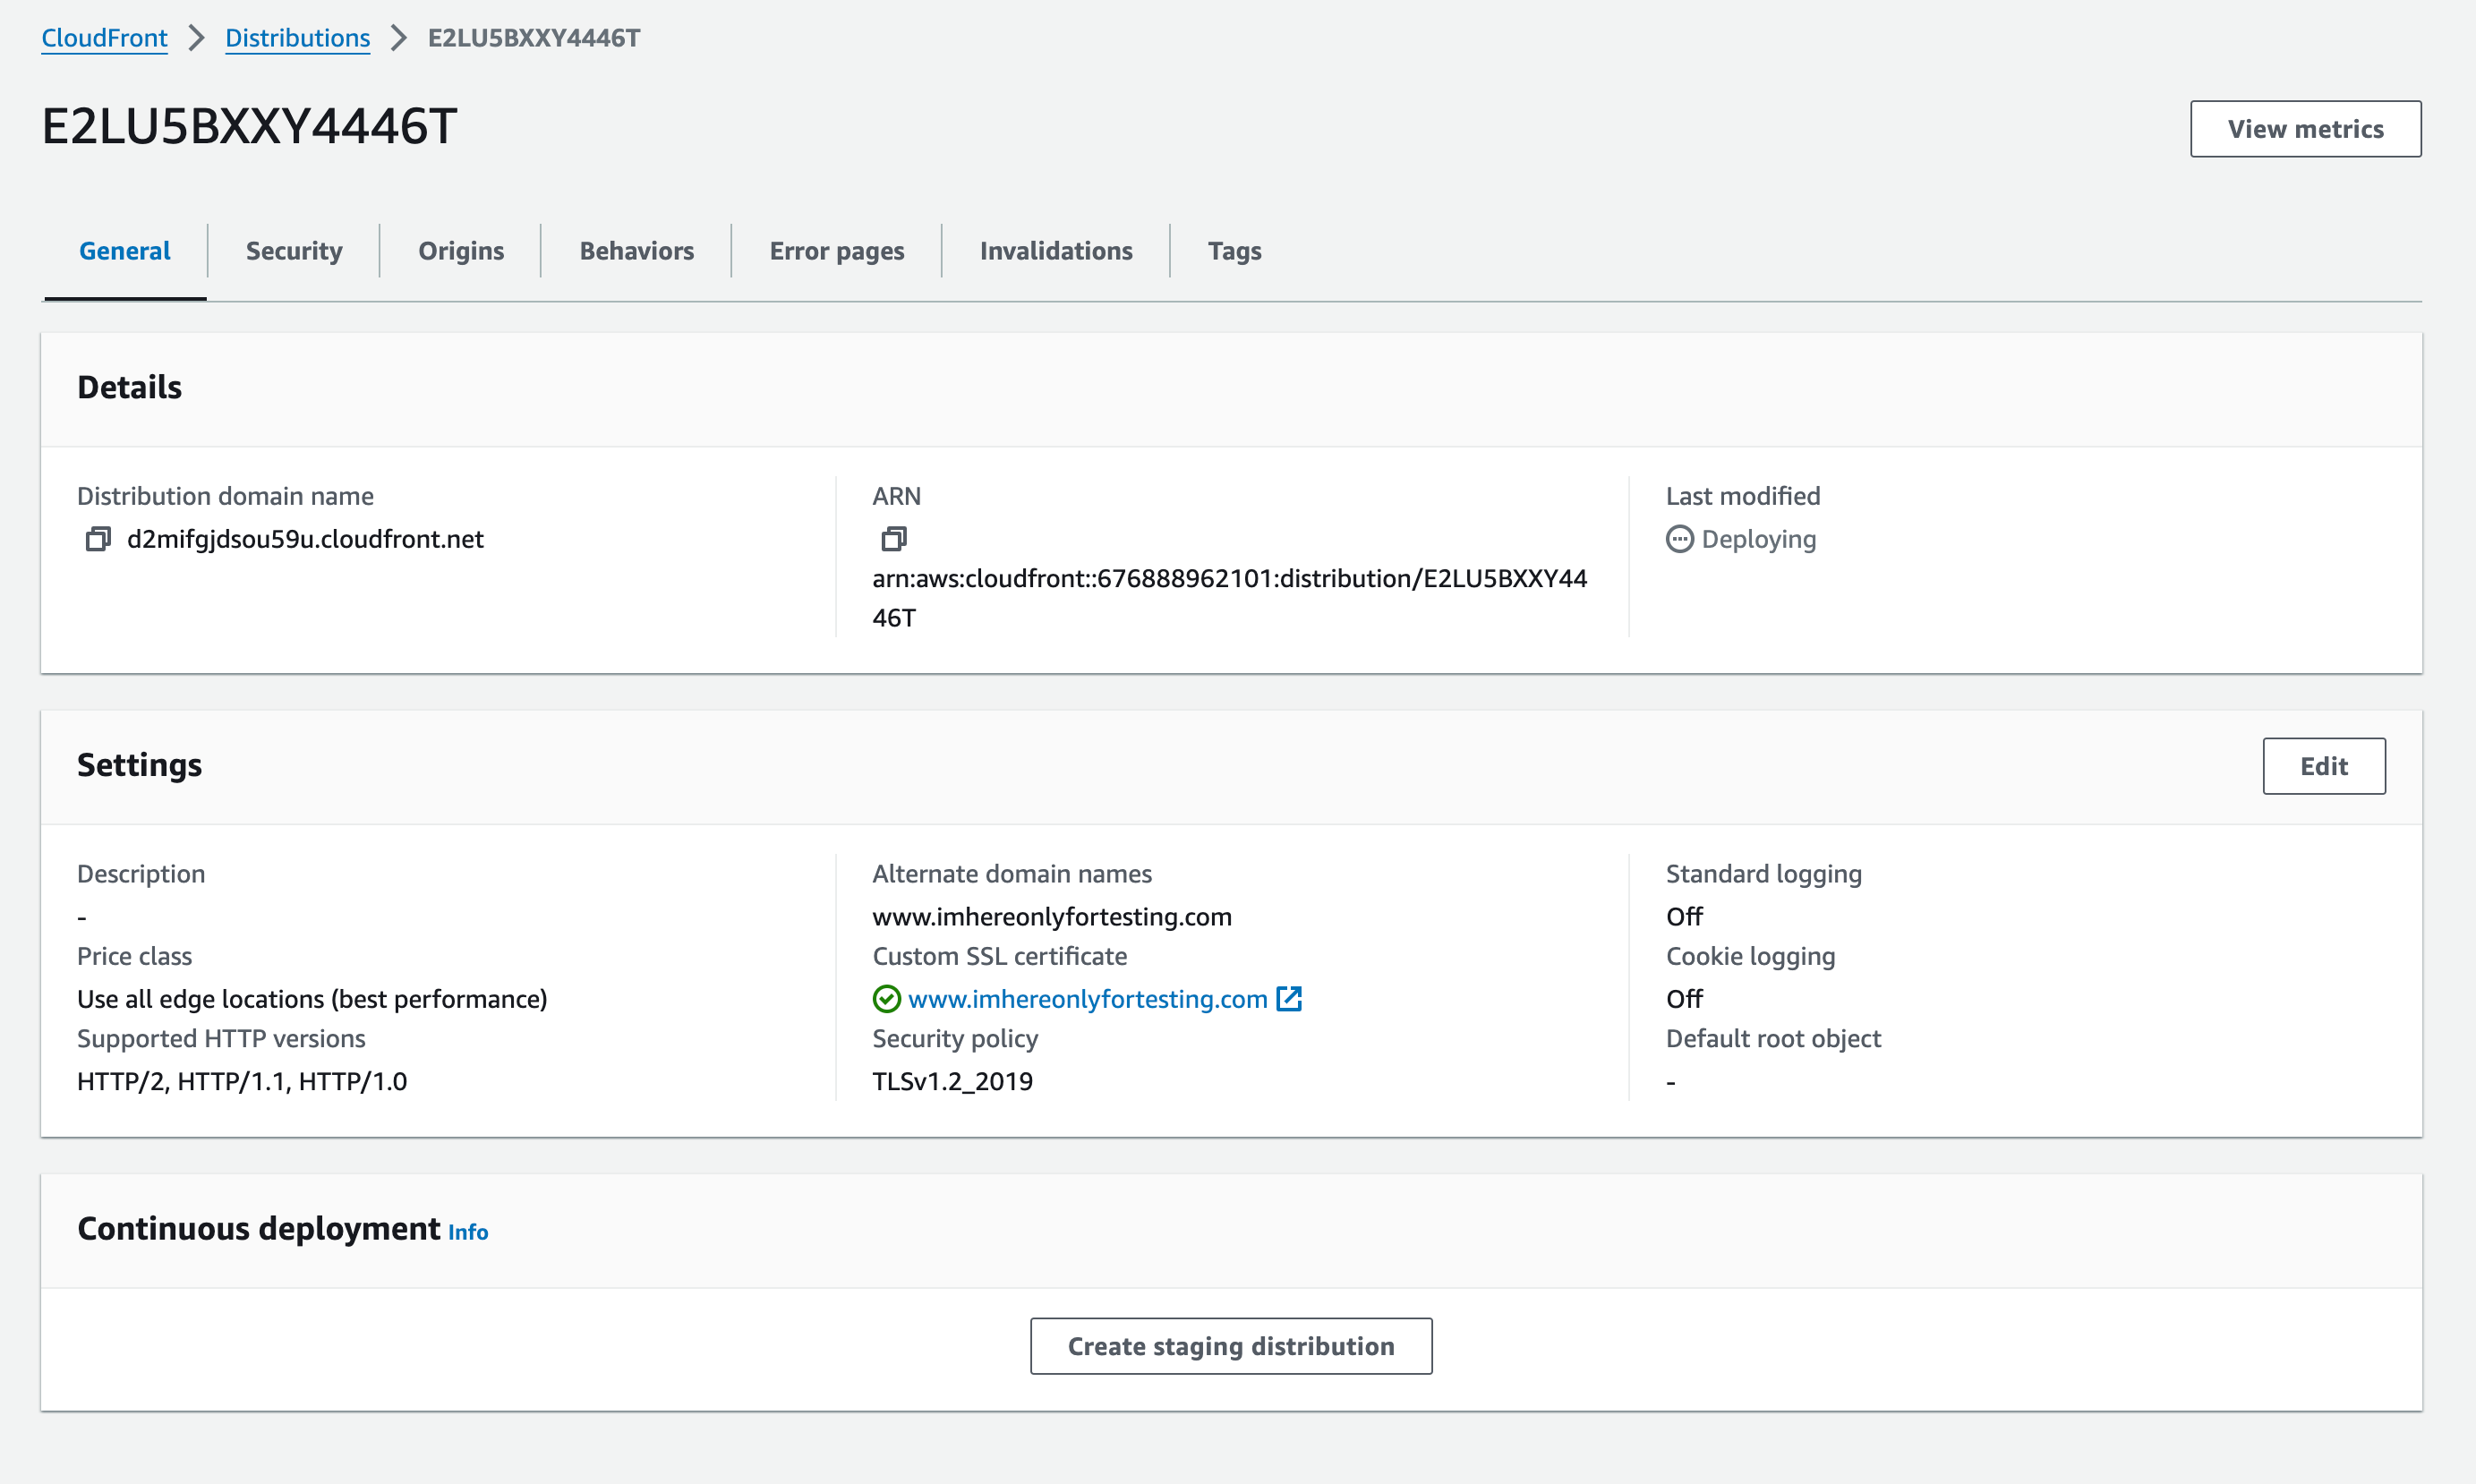
6. Once you finish above steps, distribution will get created and it will show such pending state for few minutes
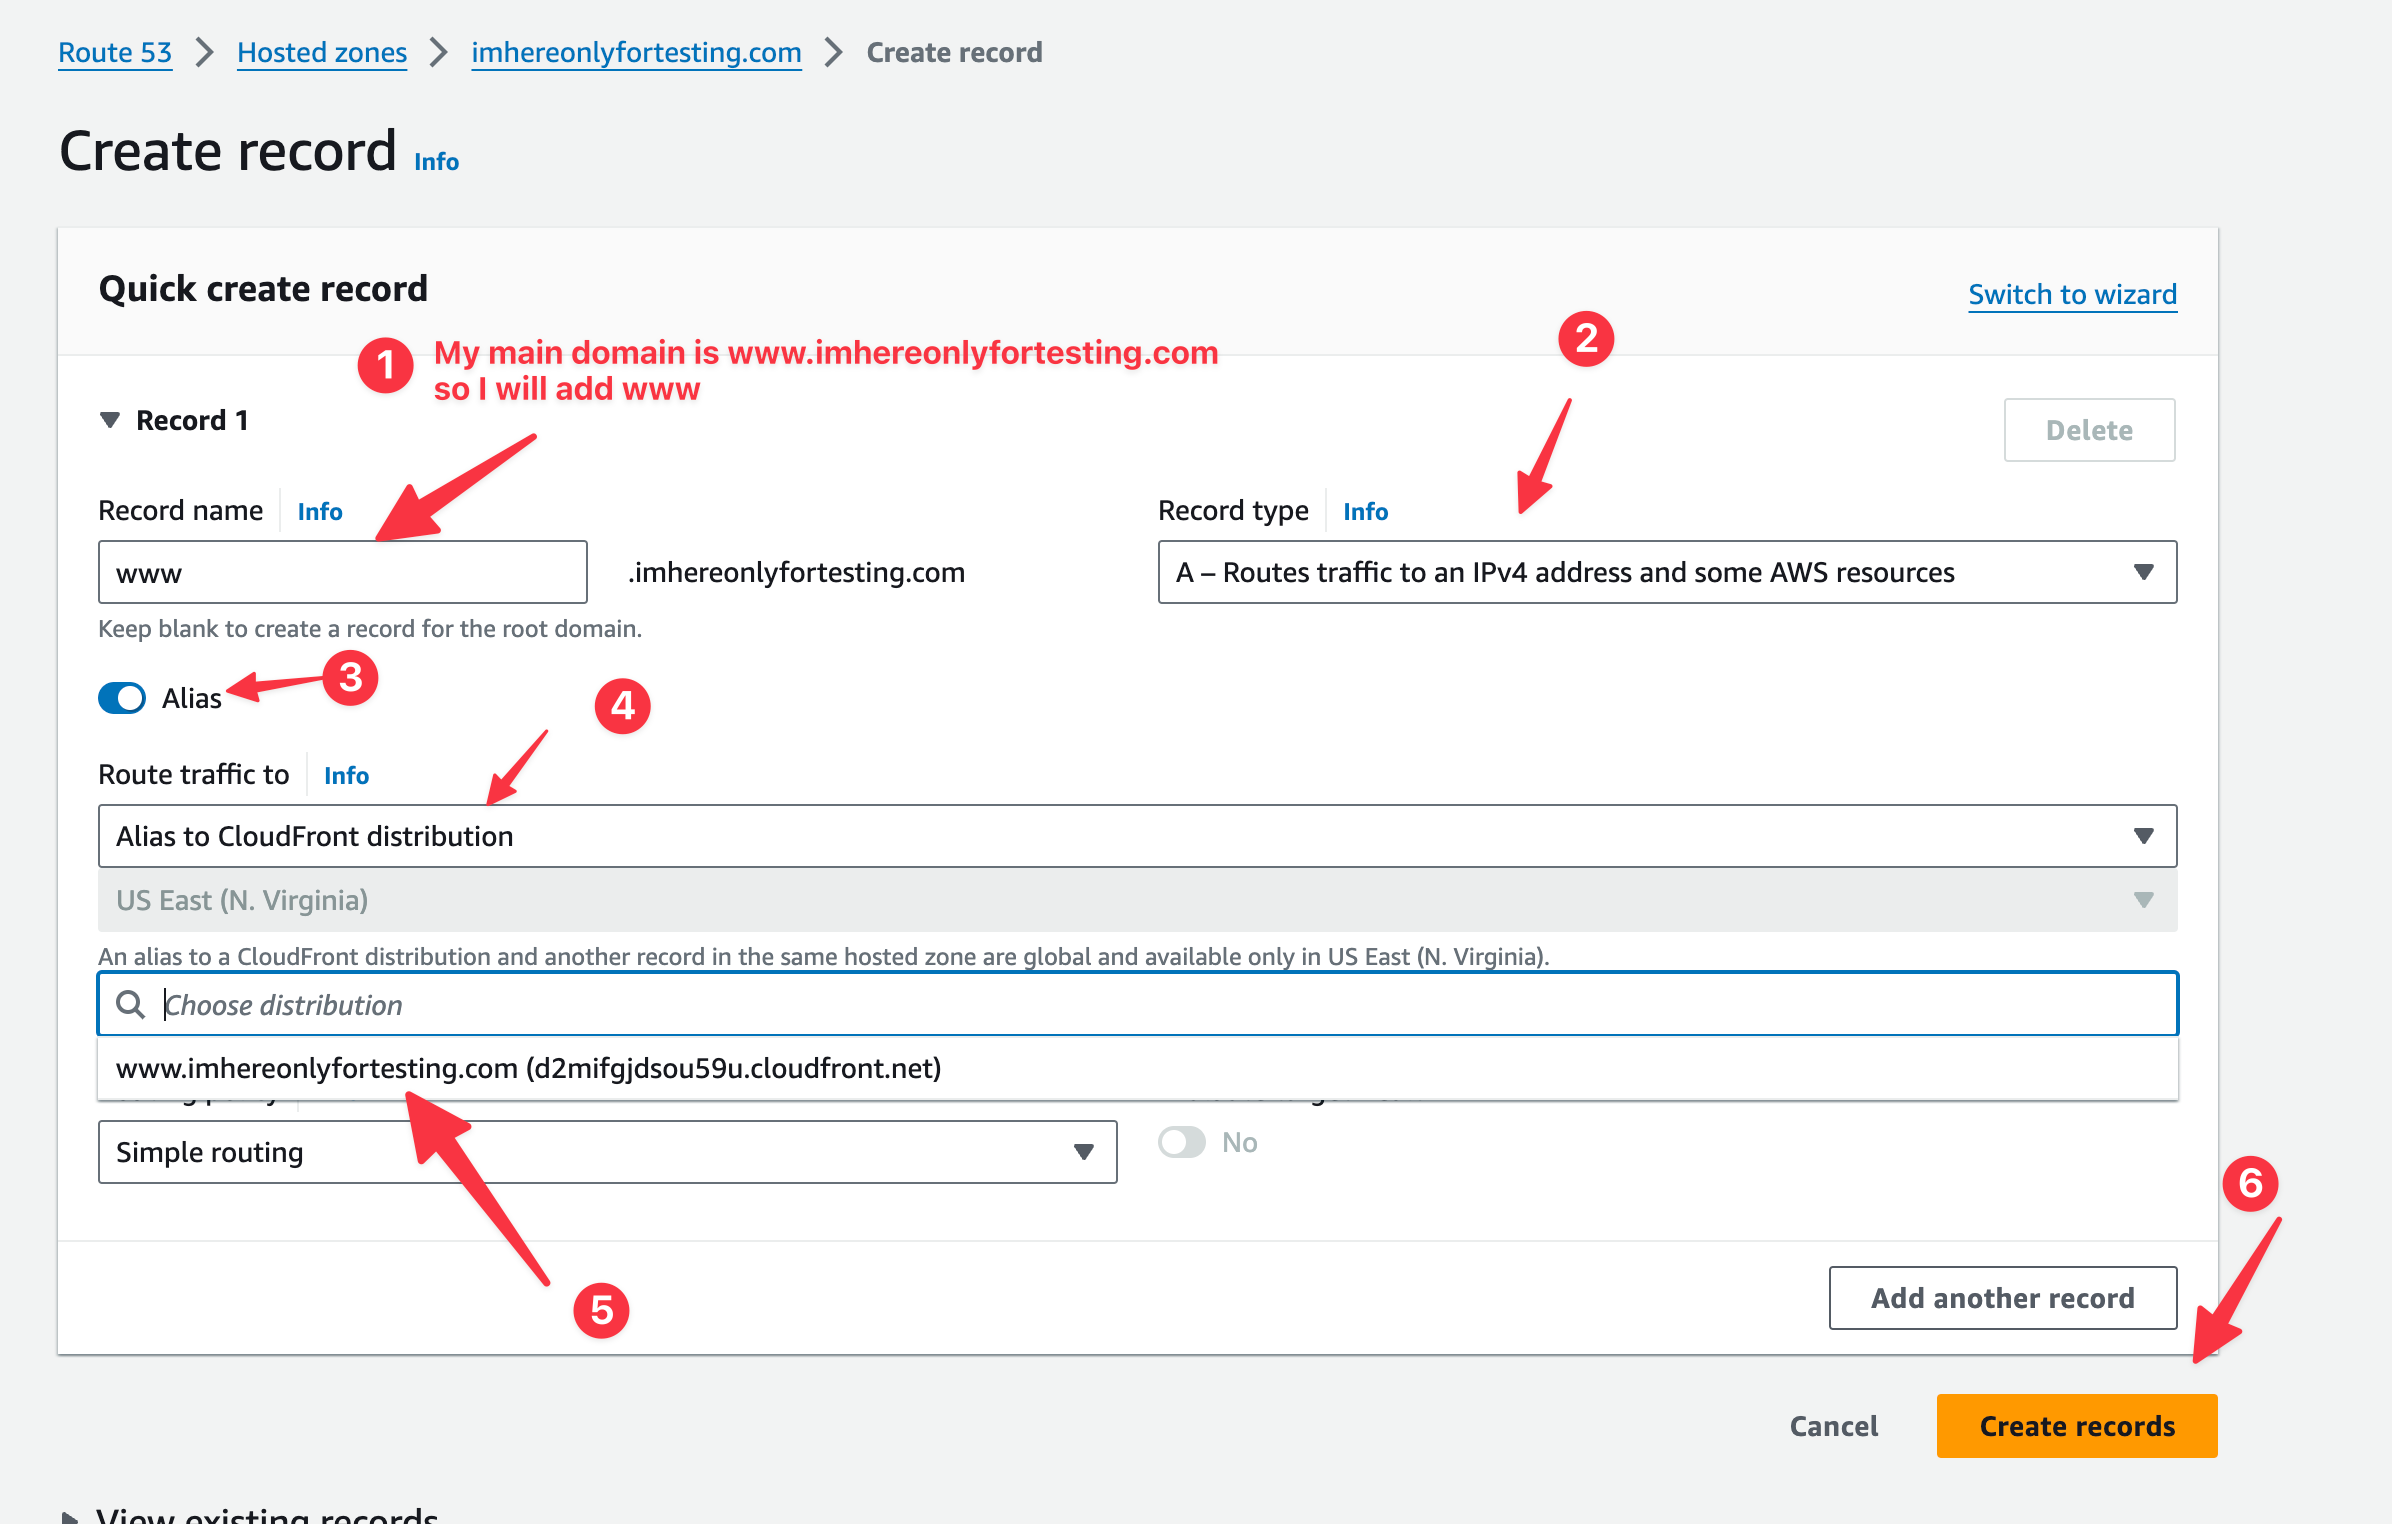
7. Add Cloudfront distribution to hosted zone
Go to Route 53 > Hosted zones > [select your hosted zone]. Press on Create record.

Select A record and enable the alias toggle then select Alias to cloudfront distribution from the dropdown. Make sure to add the Record name depending on your configuration.
Then under choose distribution, select the new distribution that you just created. Press “Create record”.
Note if you already have an A record or a CNAME record with the same record name in the DNS, the Create records will fail. A record name can only have a single DNS configuration with that record name, it can either be A record or a CNAME record.
Chance are you will have mostly have CNAME or A record with this record name. What you can do here is point that A record or CNAME record to a different record name then in cloudfront we can configure the behaviour and get it to point it to this new record name.
This is super complicated feel free to contact support@feather.so, we will help you with this.
8. Add behaviour to cloudfront distribution
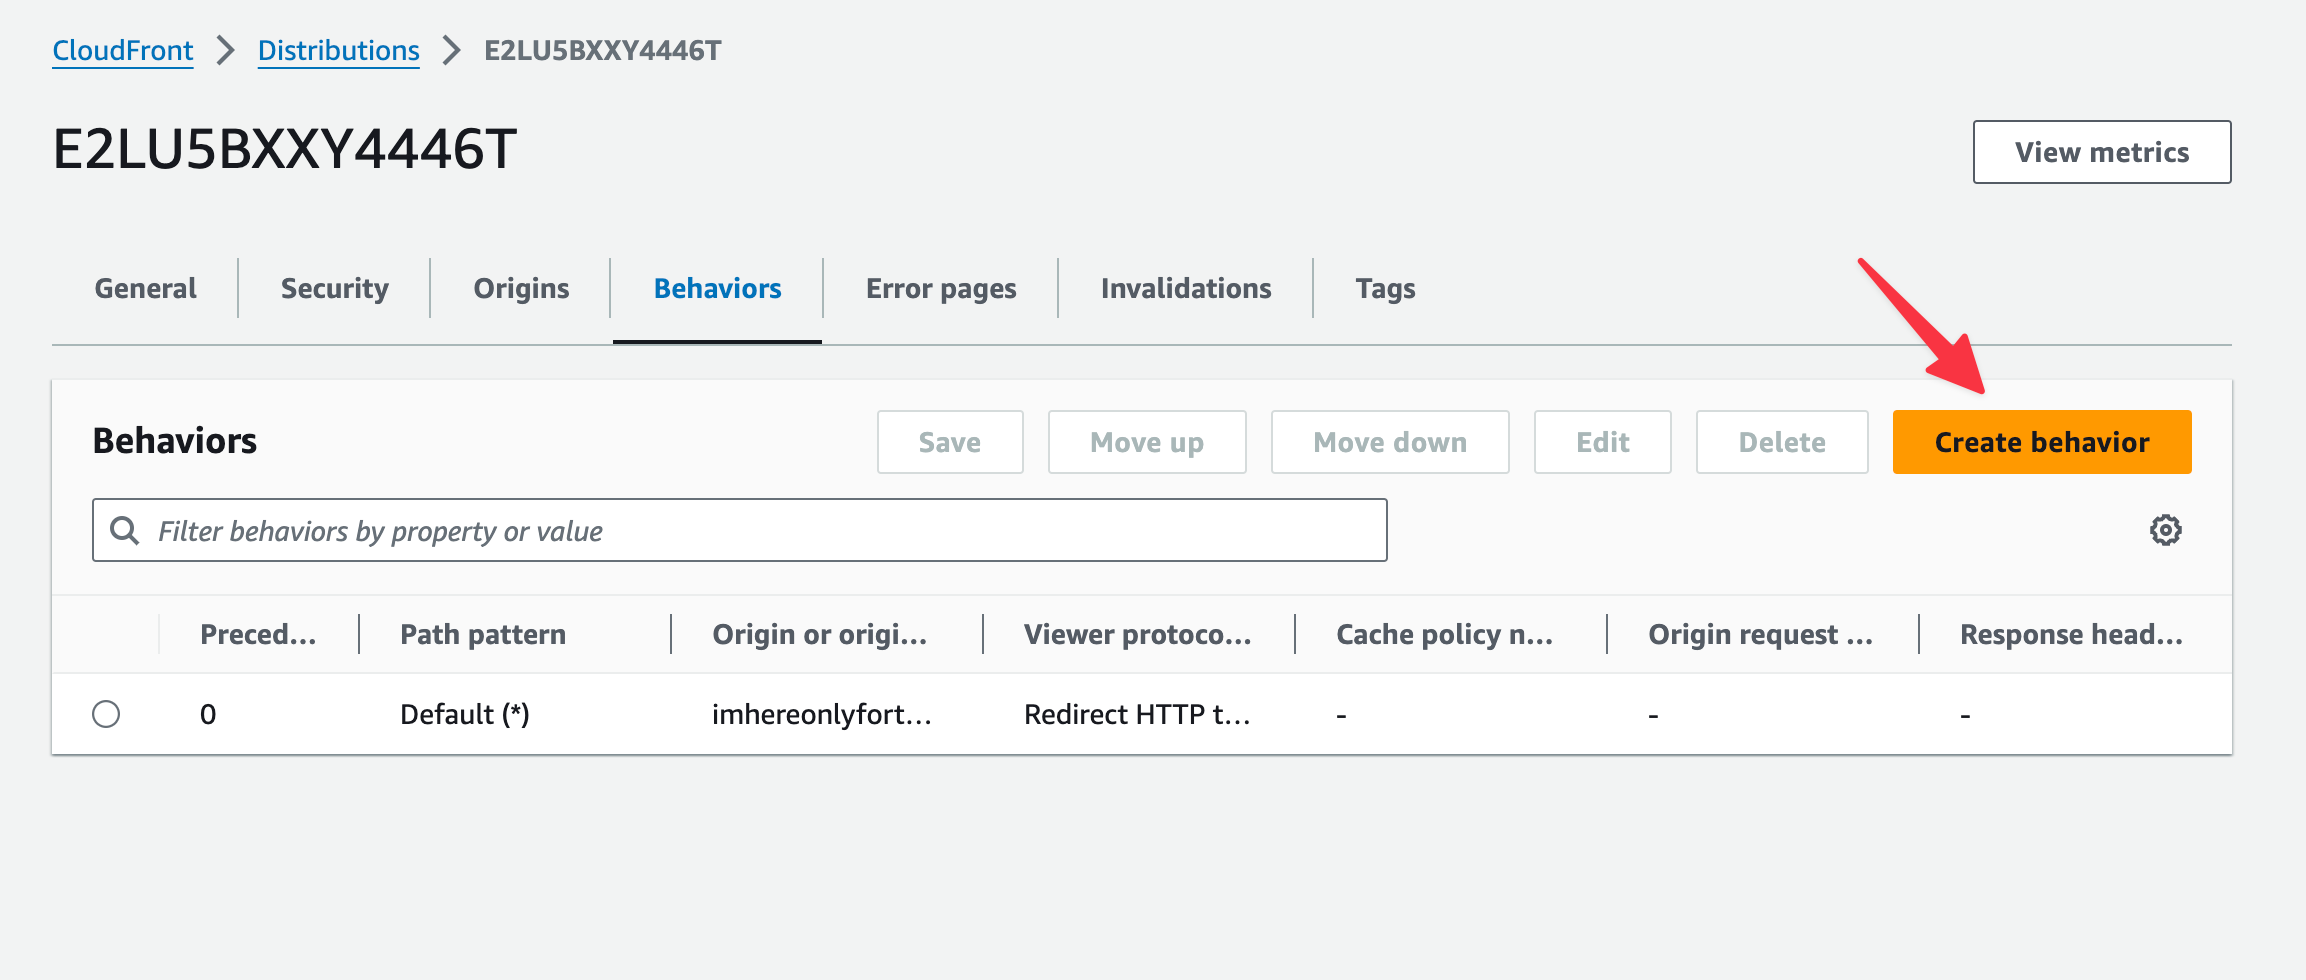
Add configuration for
/blog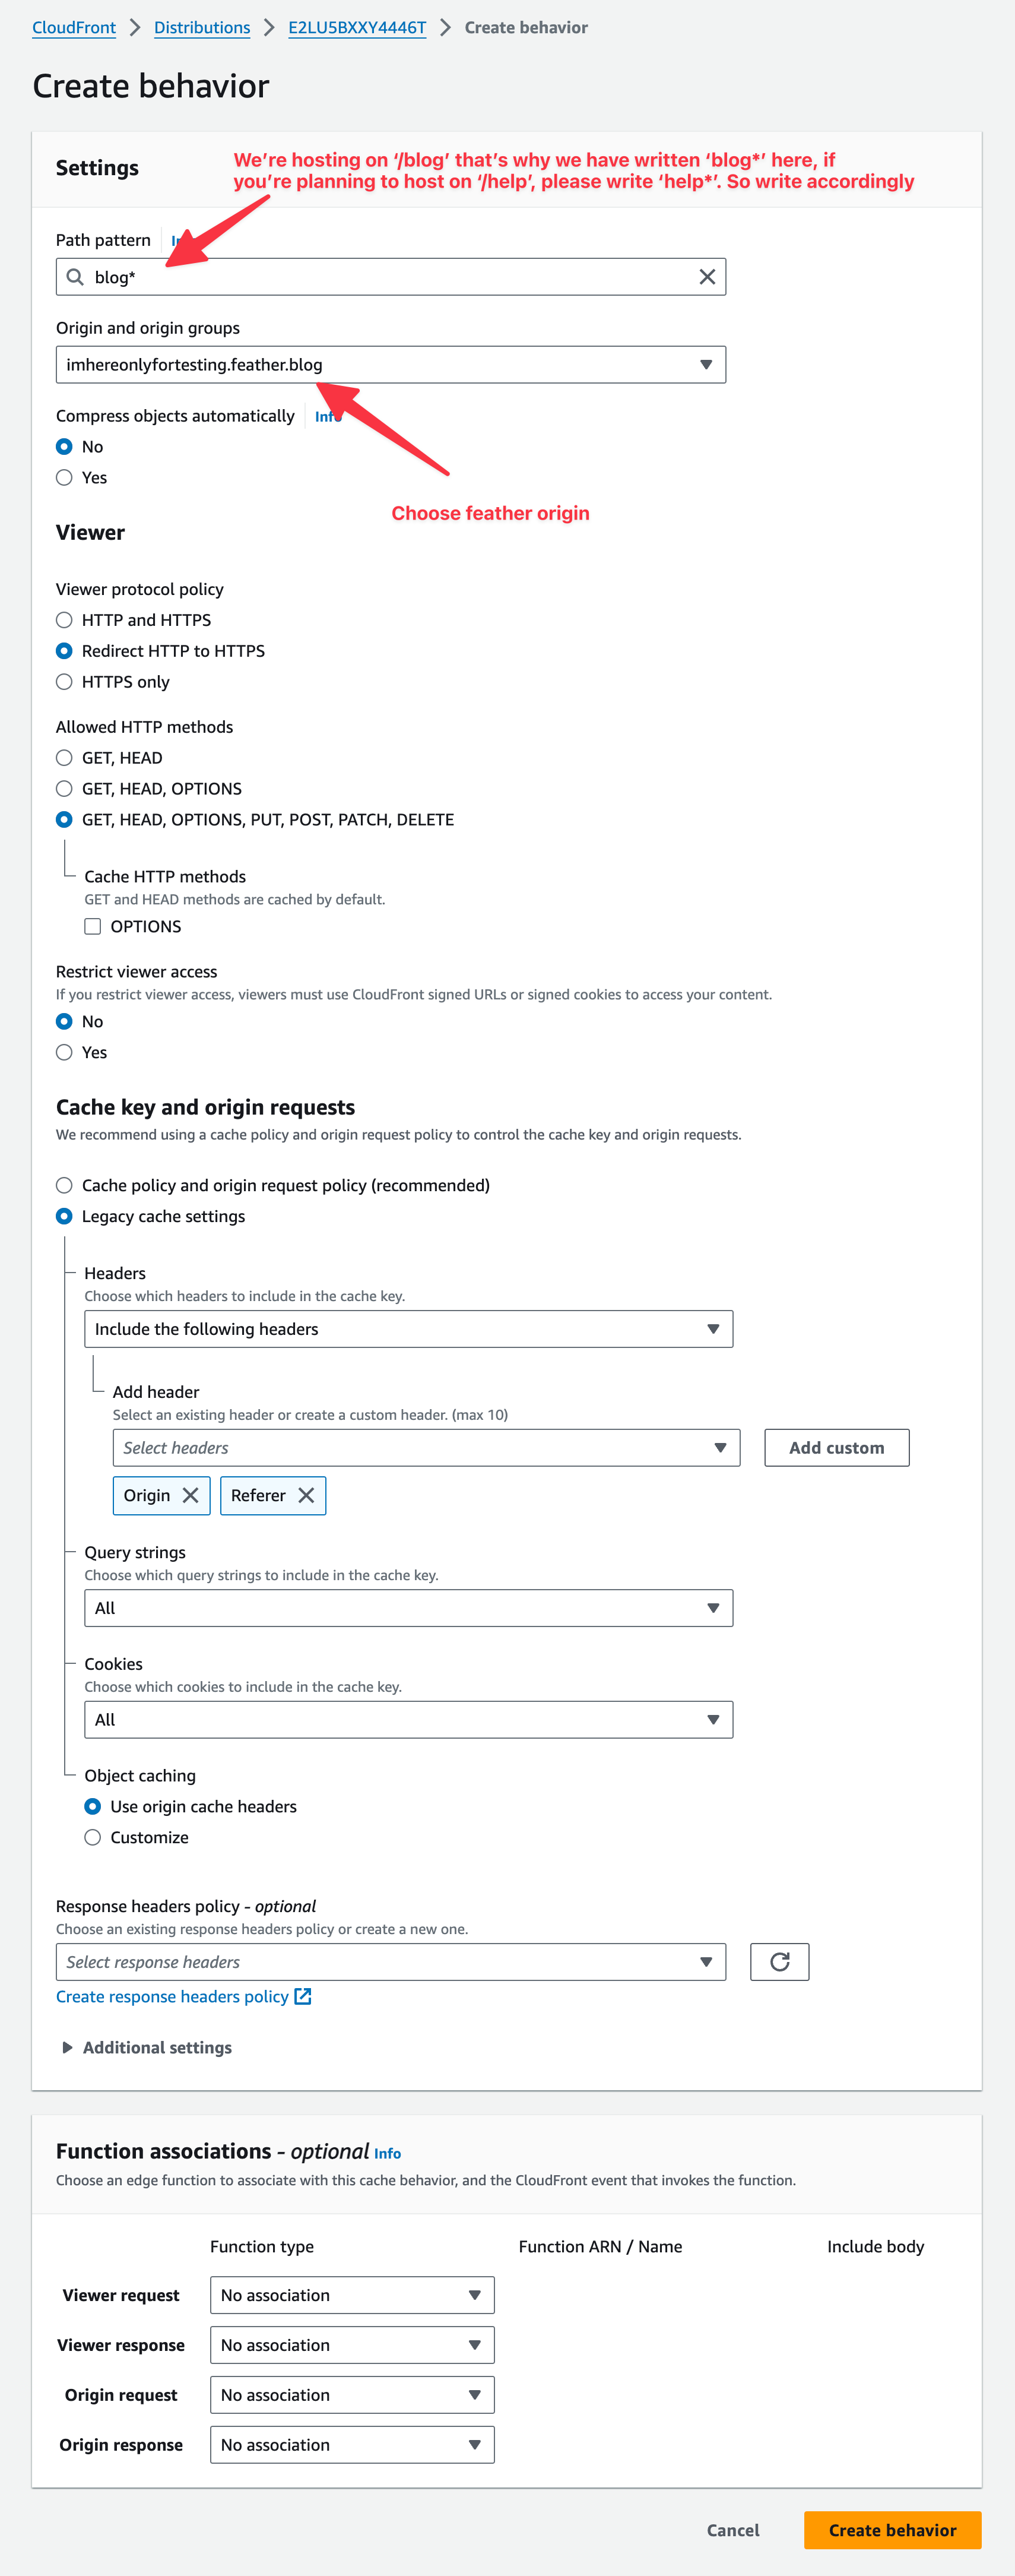
Add configuration for
/_feather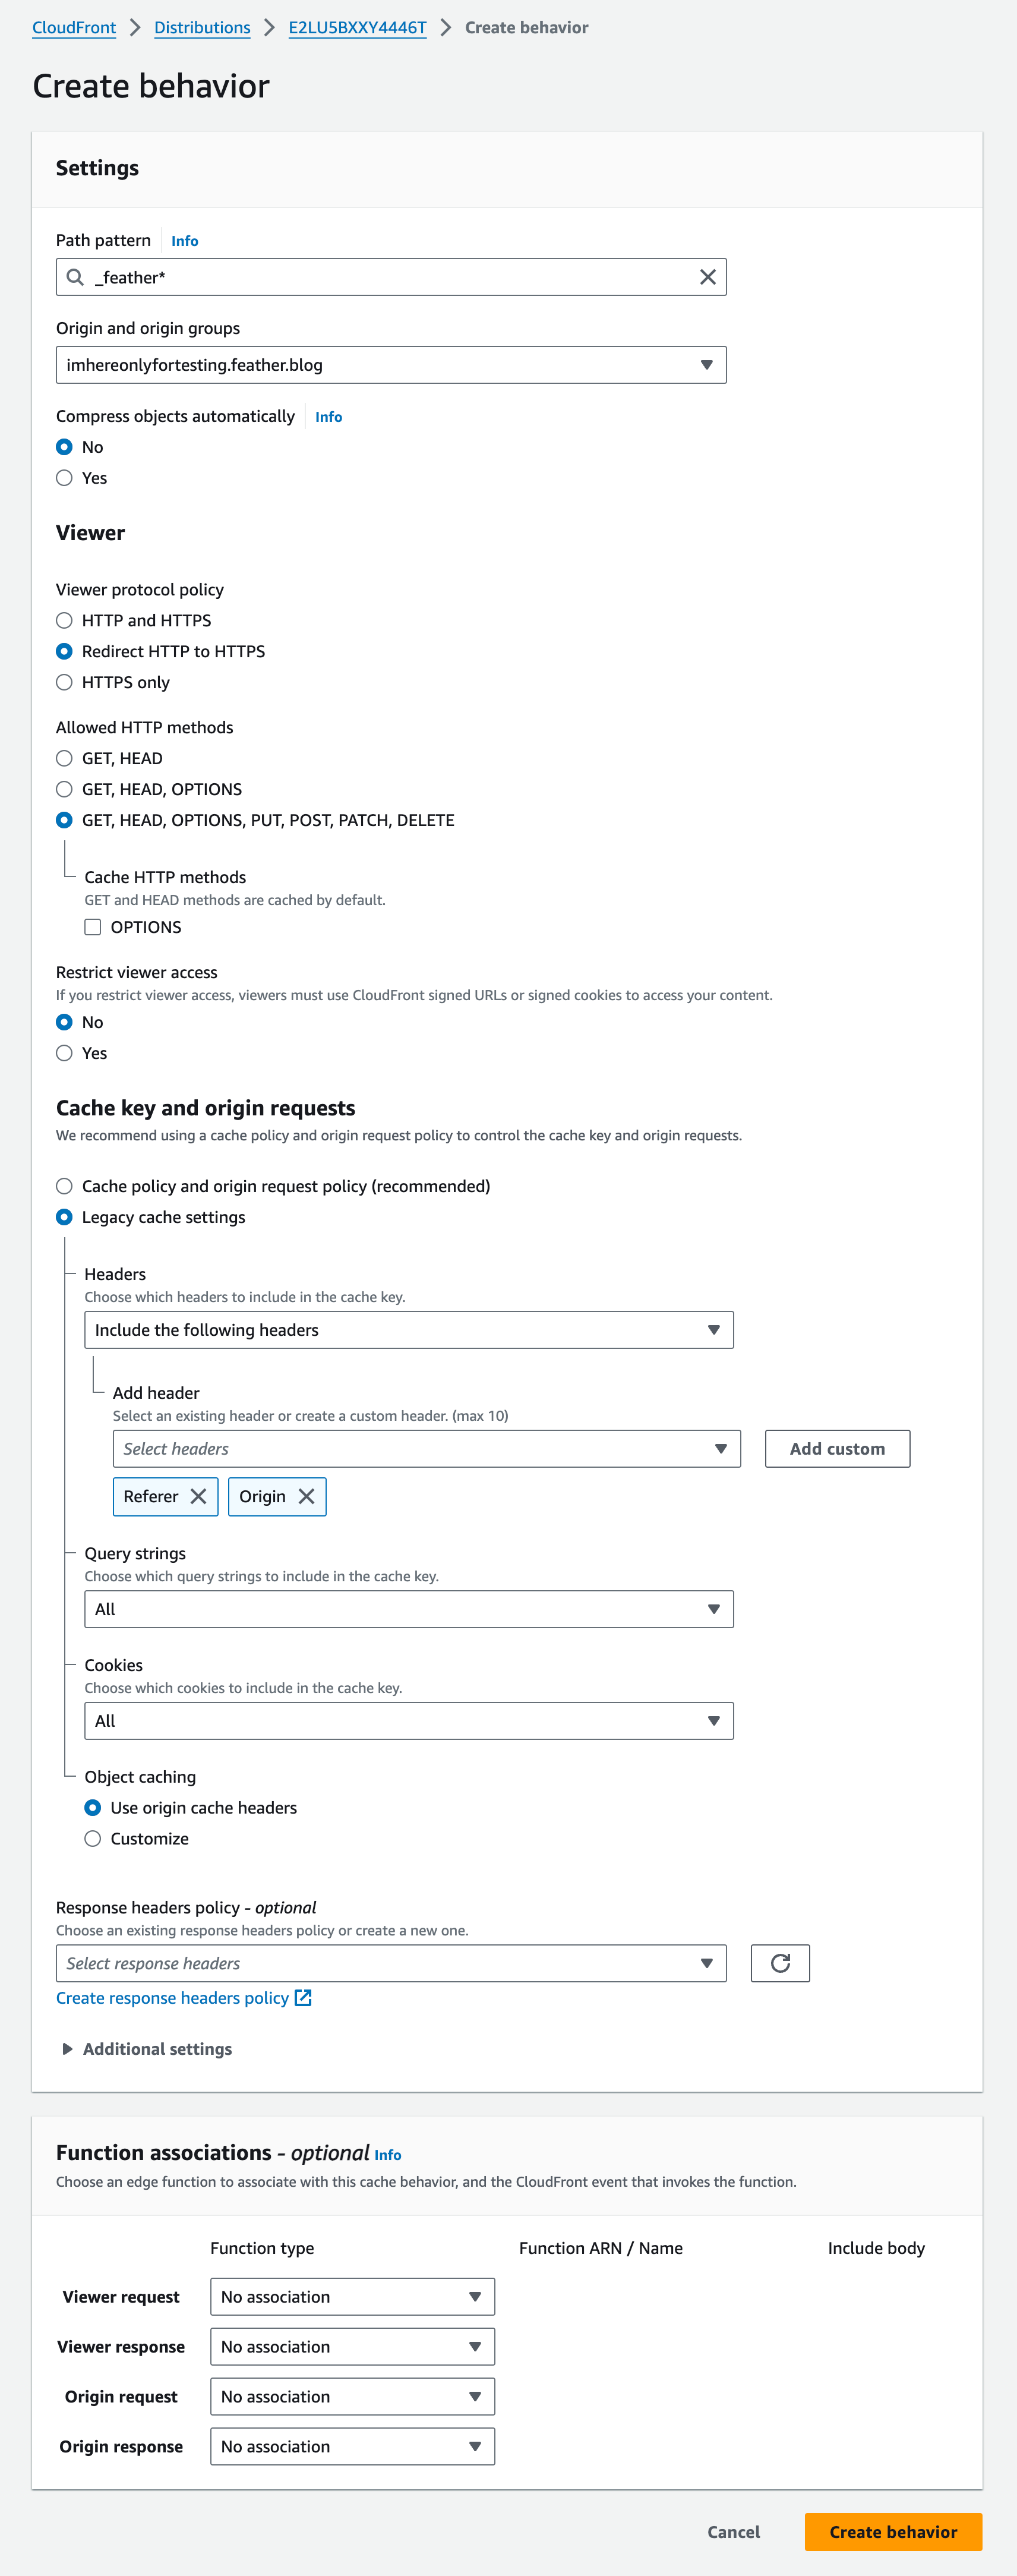
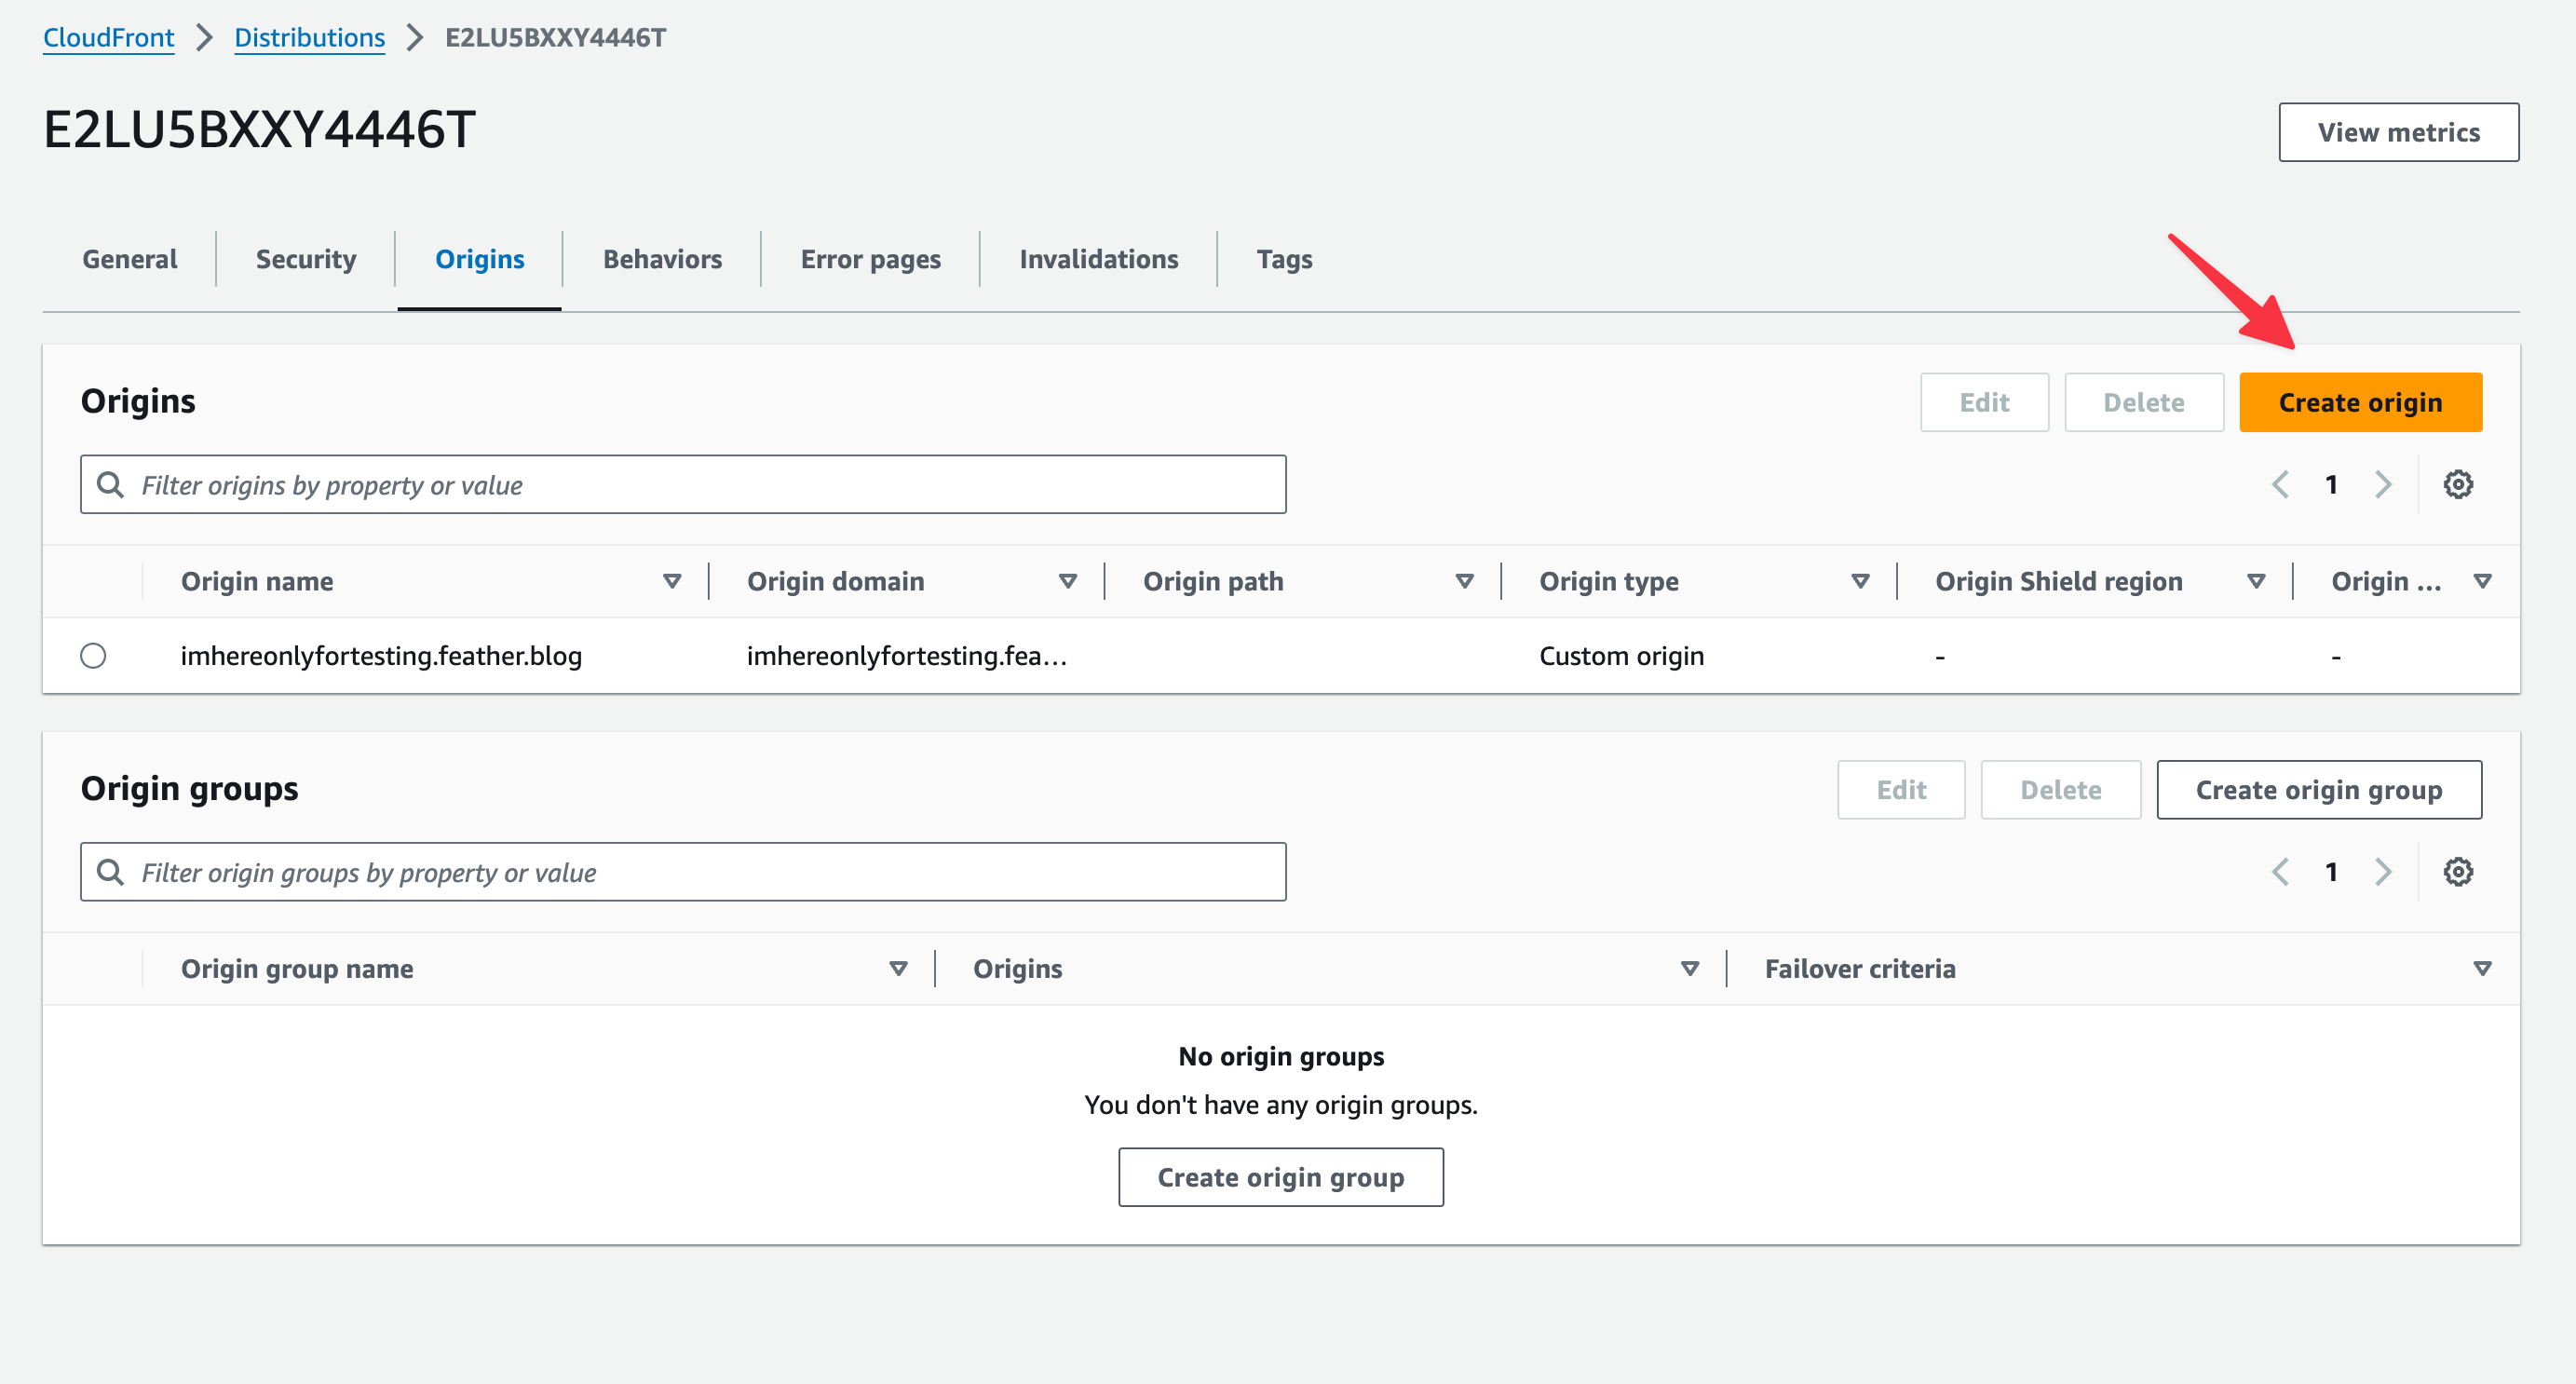
9. Create an origin that points to where your actual site is hosted
When you add cloudfront in front of the domain all the requests goes through cloudfront first. We need to configure cloudfront that for the routes other than/blog, points to where our site is hosted.

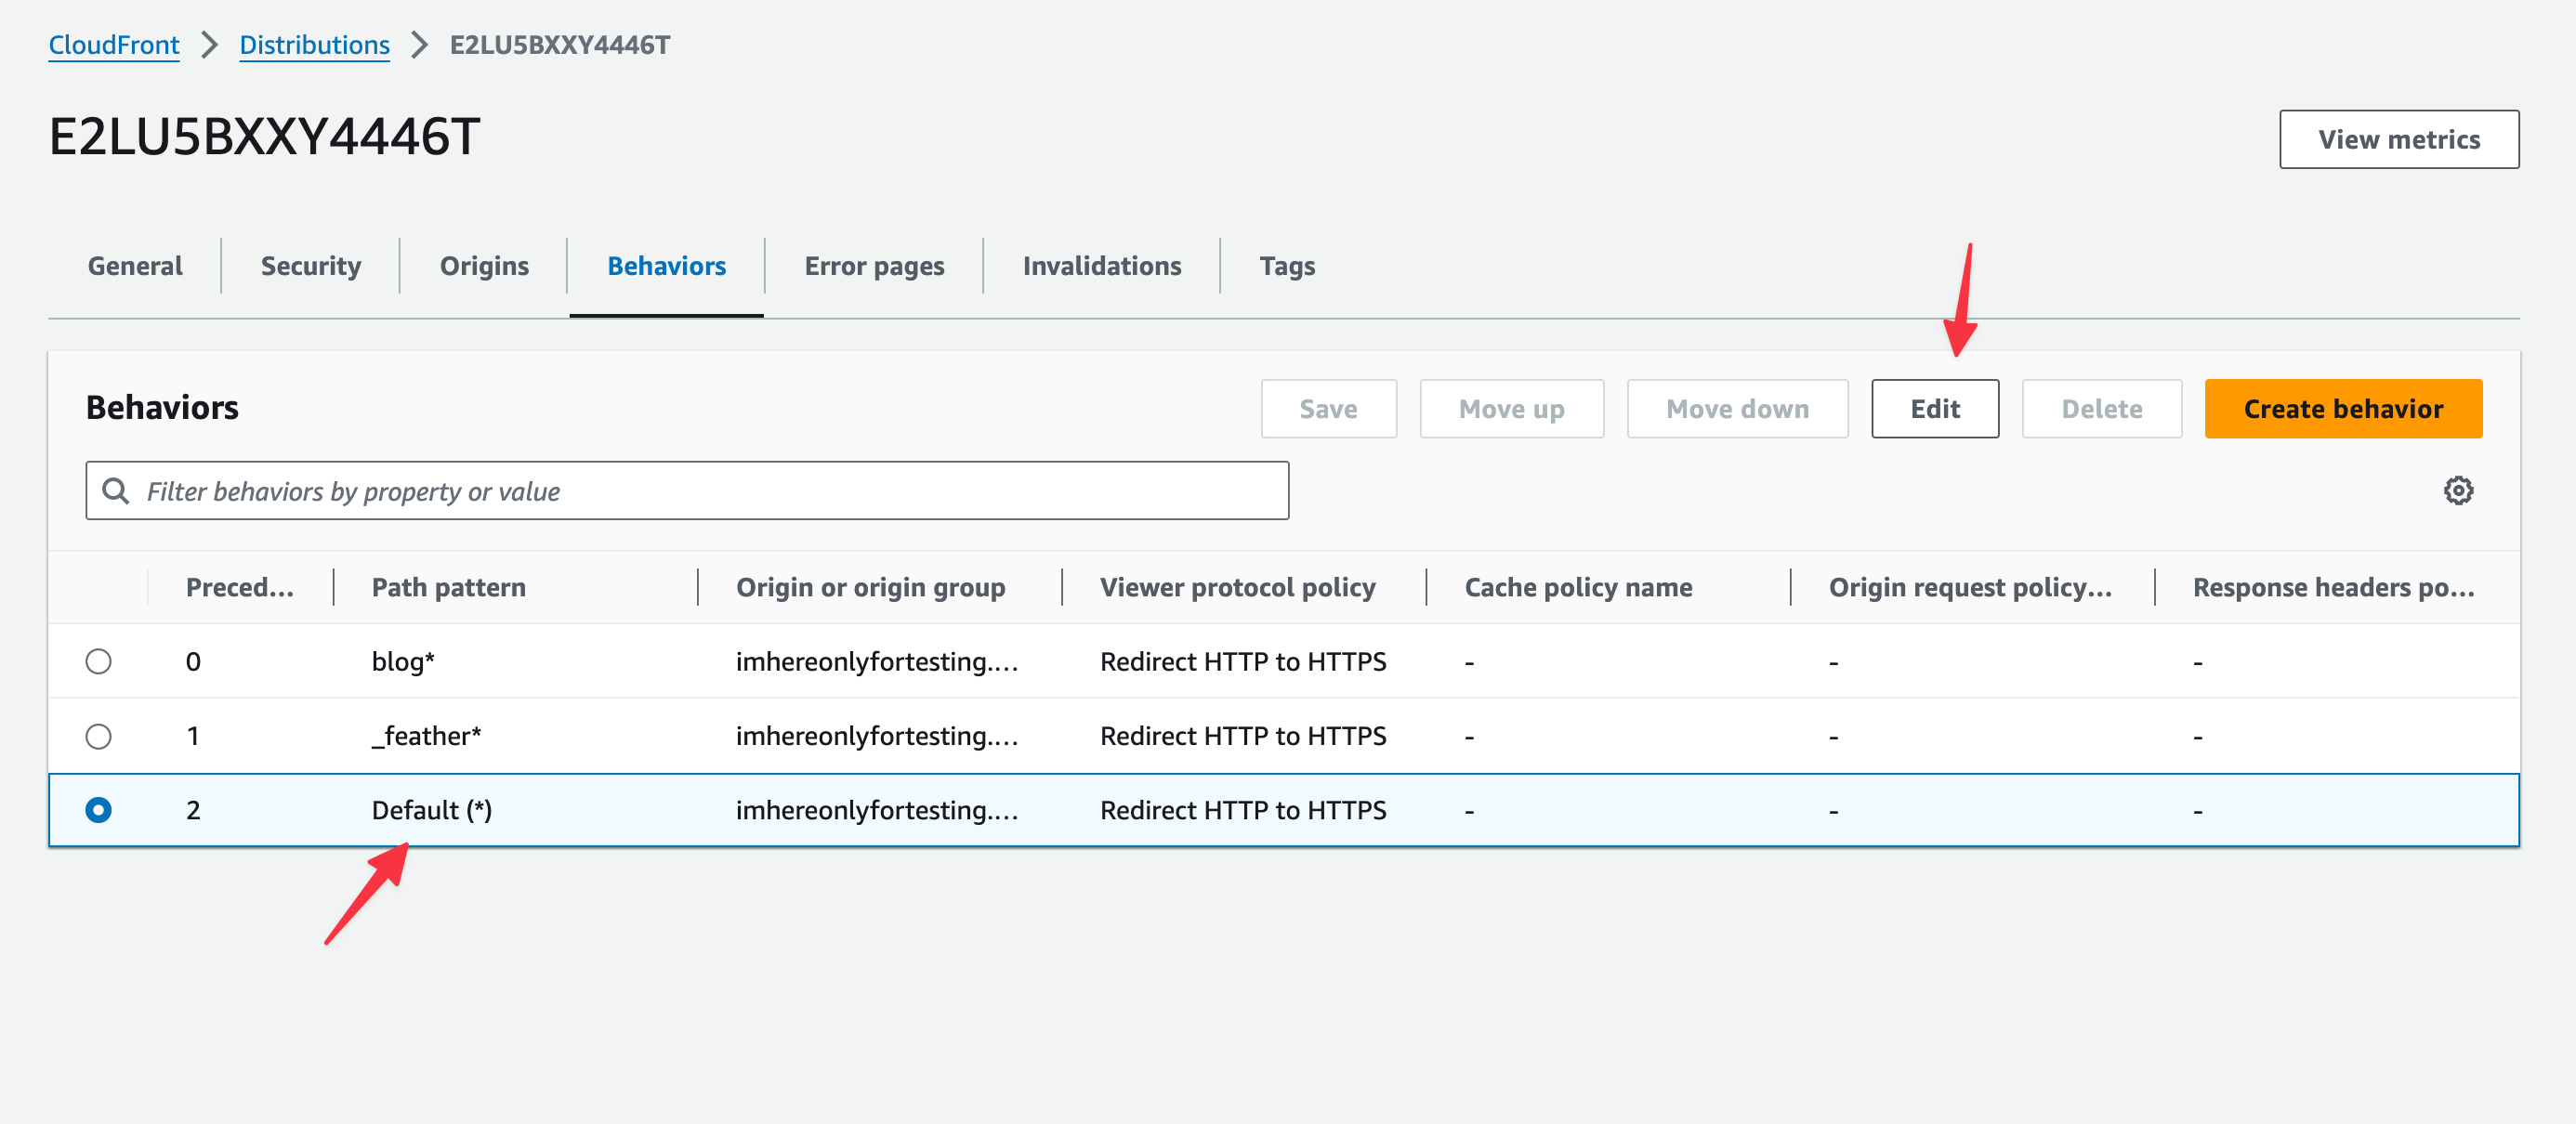
10. Use the origin created in above setup for default behaviour
Go to Behaviors > Select Default > Press edit
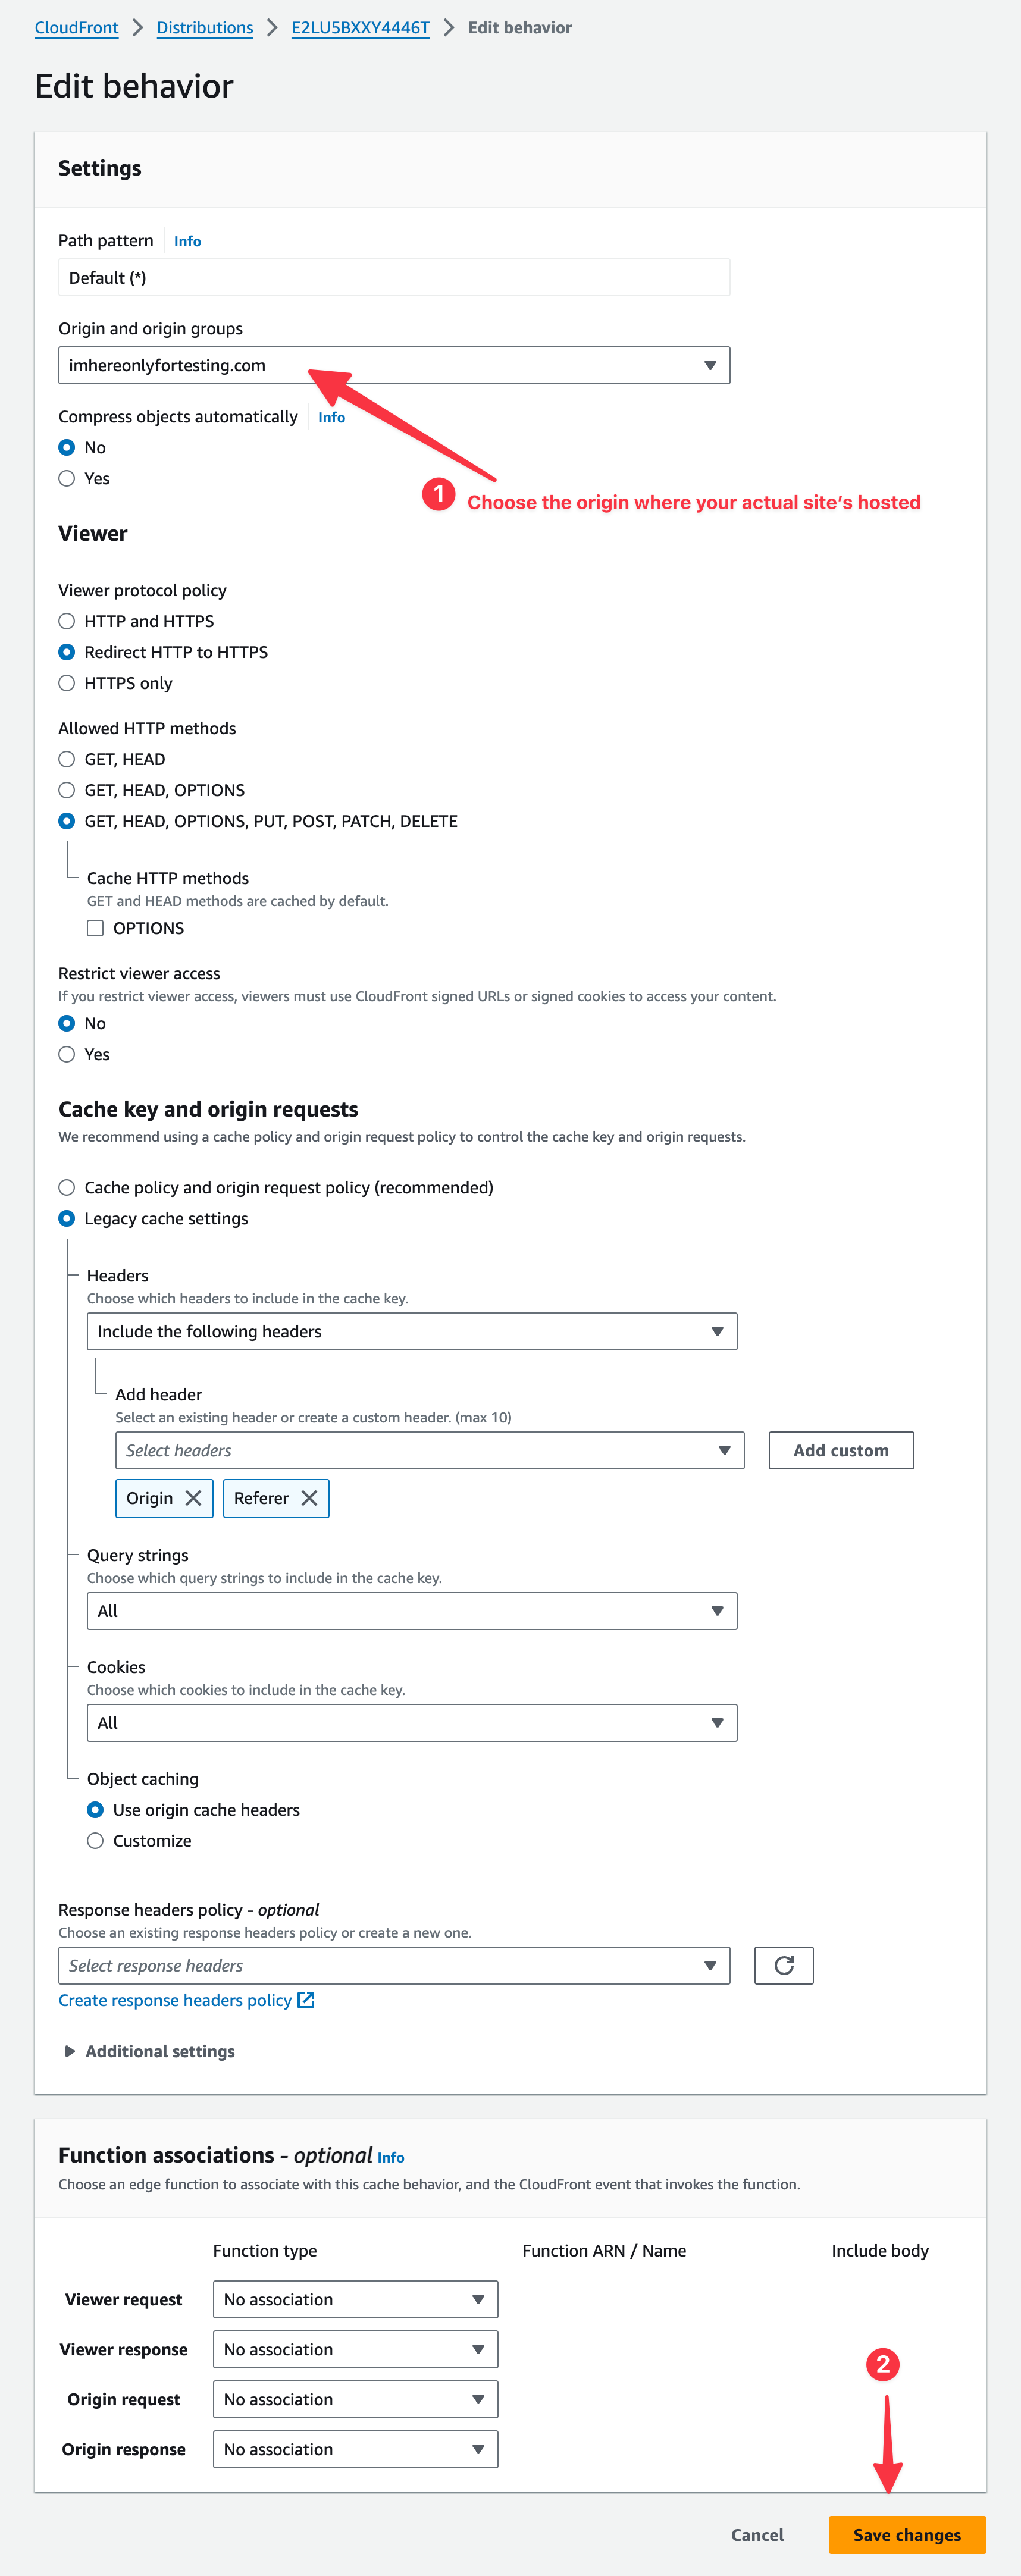
Press save changes. With this our Cloudfront configurations finishes. Your main domain should work as expected. (for me
www.imhereonlyfortesting.com will work fine).
Now go to Feather. Navigate to Settings > Features and switch on “Enable Subdirectory” features.
After that go to Settings > Sub-folder management and enter the following values,
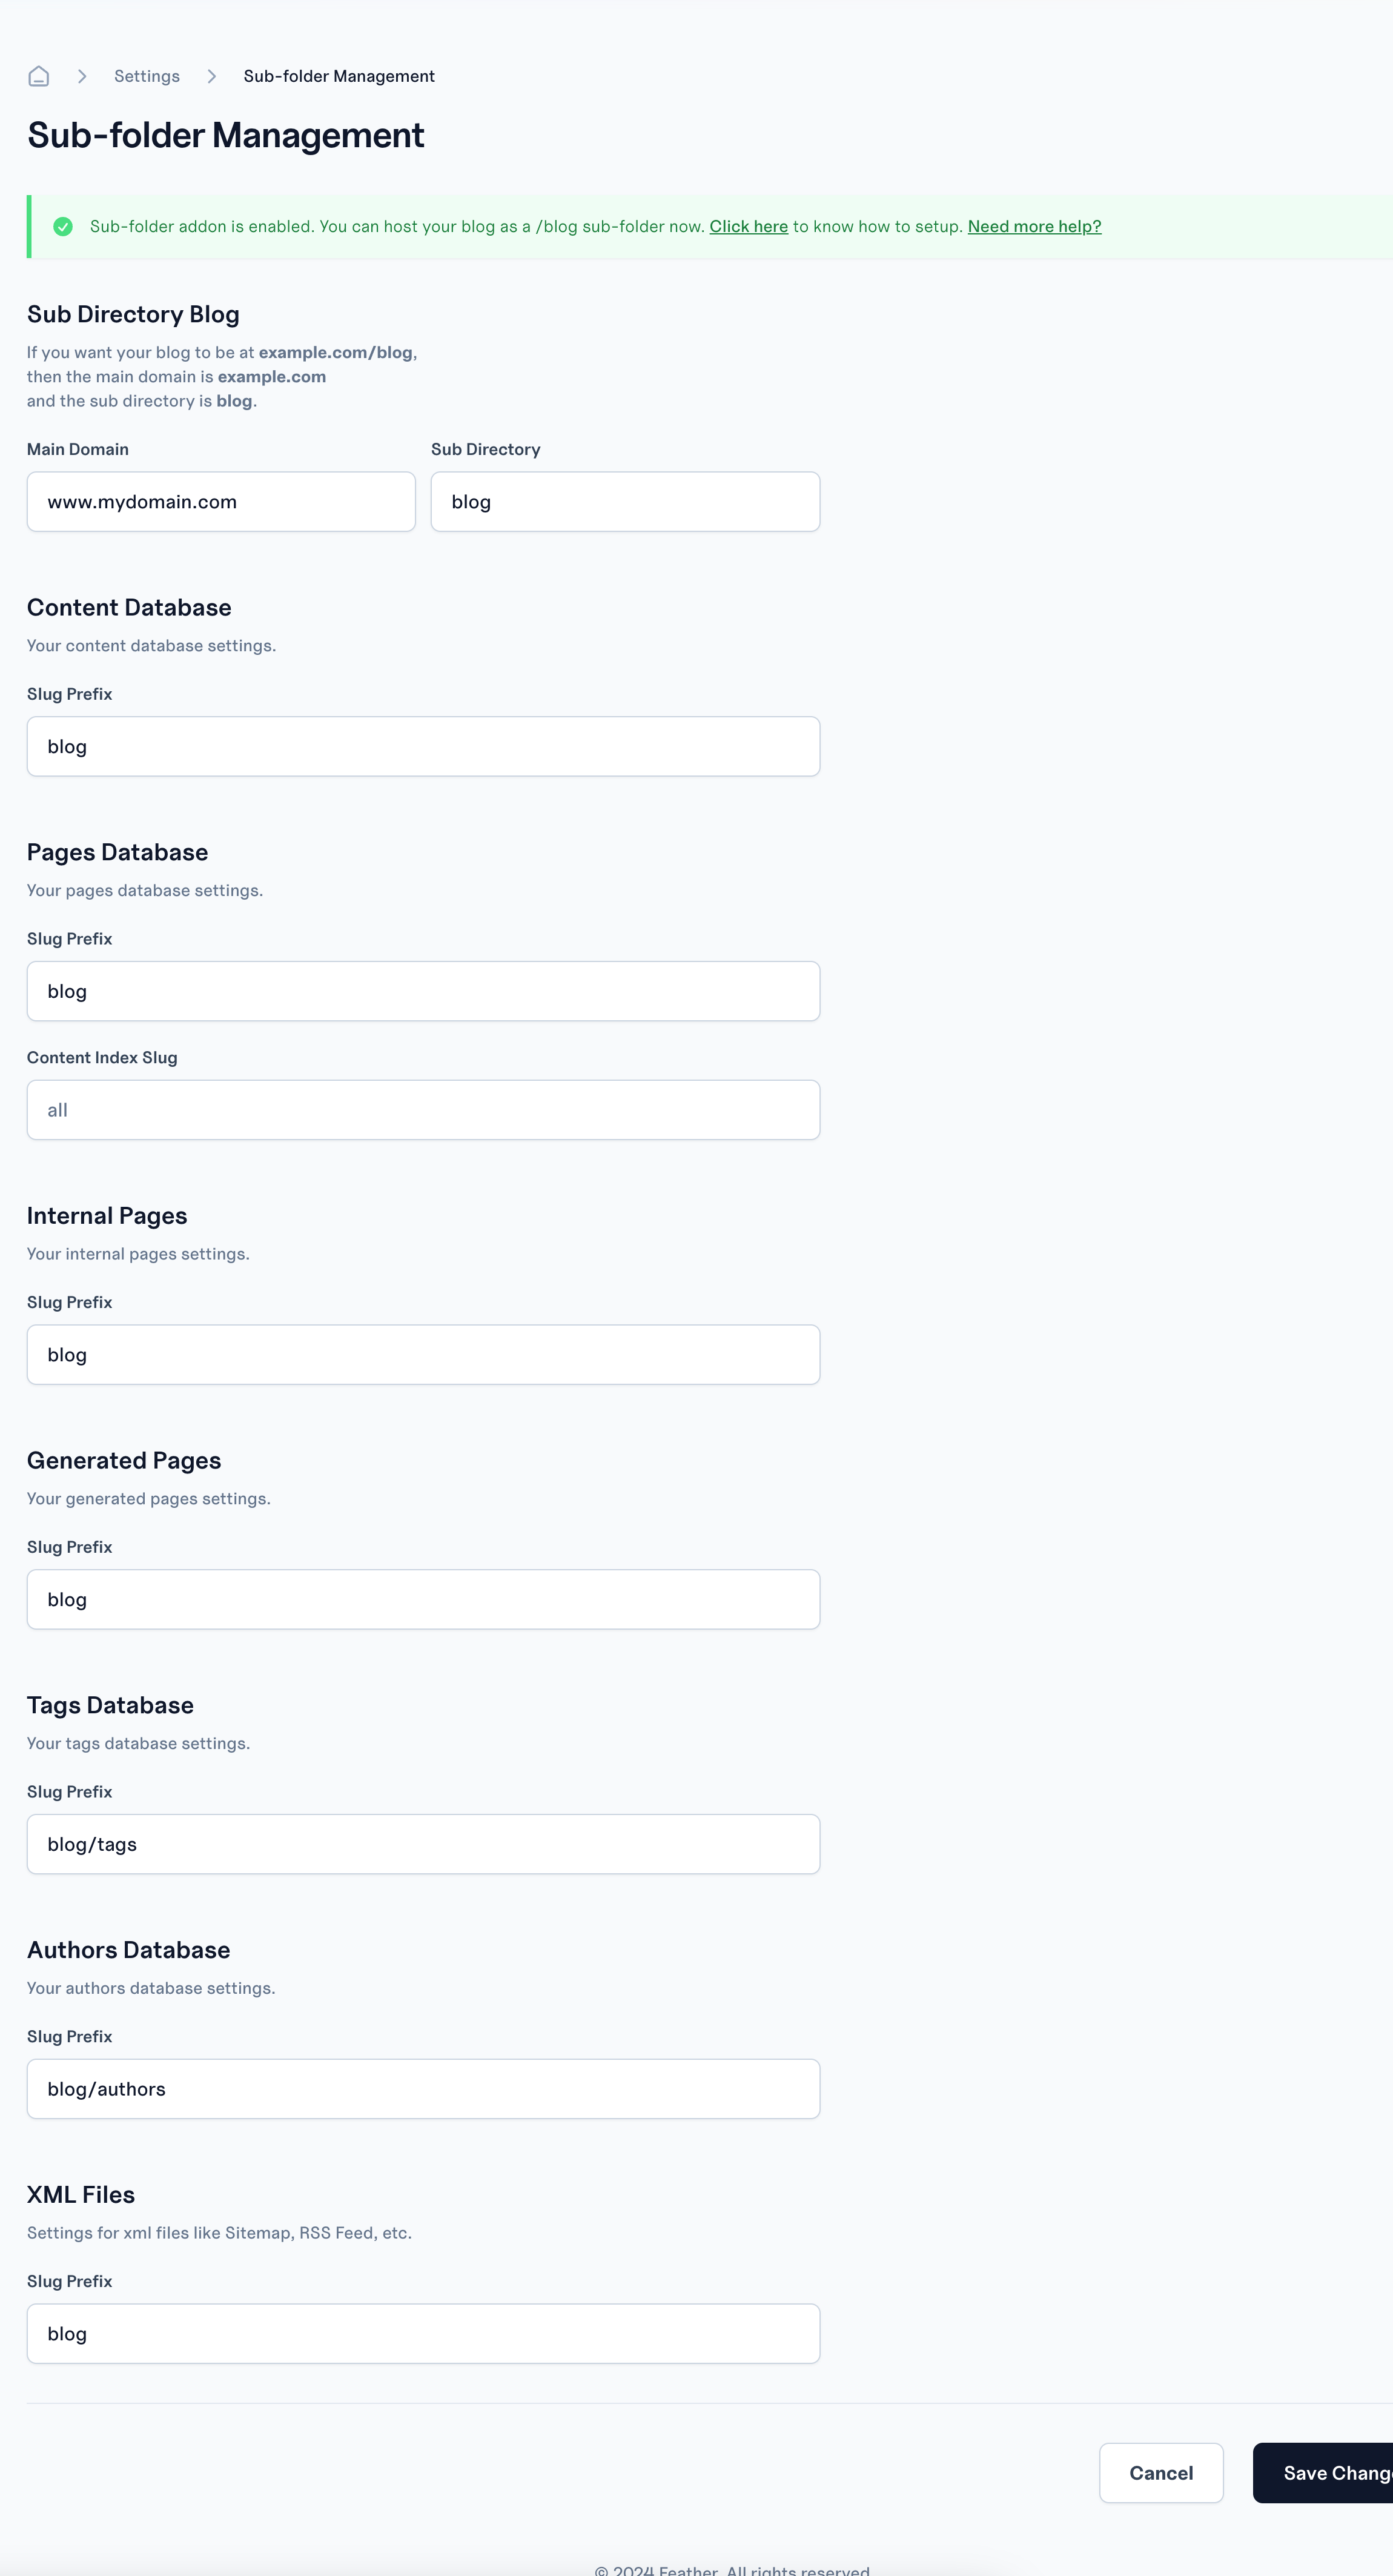
Make sure to replace
www.mydomain.com with the domain you are using and blog with whatever sub-route you plan to use.Important Note: Under the Domains section make sure that you are using Subdomain settings. If you have added a custom domain there, please remove it. Sub-folders does not require the Custom Domain configurations and if you have it, then the sub-folder will not work.
Once you do these, your sub-folder should be live. You should be able to access your feather site on
www.mydomain.com/blog. If it’s not reach out to us at support@feather.so.